Unit 1: Introduction to Word Processing
Word Processing क्या है?
Word Processing एक ऐसी प्रक्रिया है जिसमें कंप्यूटर की सहायता से हम टेक्स्ट (Text) को टाइप, एडिट, फॉर्मेट, सेव, प्रिंट और शेयर कर सकते हैं।
यह कार्य “Word Processor” नामक सॉफ़्टवेयर से किया जाता है।
सरल शब्दों में: Word Processing का अर्थ है — “किसी लिखित दस्तावेज़ (Document) को कंप्यूटर पर तैयार करना, उसमें संशोधन करना और उसे सुंदर रूप में प्रस्तुत करना।”
उदाहरण:
- Microsoft Word
- LibreOffice Writer
- Google Docs
- WPS Office Writer

Word Processor क्या है?
Word Processor एक Application Software है जो उपयोगकर्ता को Text आधारित Document बनाने, संपादित करने (Editing) और फ़ॉर्मेट करने (Formatting) की सुविधा देता है।
Word Processor की प्रमुख विशेषताएँ:
- Editing — Cut, Copy, Paste, Undo, Redo
- Formatting — Font Style, Color, Alignment, Paragraph
- Graphics — Pictures, Tables, Charts, WordArt
- Proofing — Spelling & Grammar Check
- Mail Merge — एक साथ कई पत्र तैयार करना
- Printing — Print Preview, Page Setup, PDF Export
Microsoft Word क्या है?
Microsoft Word एक लोकप्रिय Word Processing Software है, जिसे Microsoft Corporation ने विकसित किया है।
यह MS Office Package का हिस्सा है और Windows, macOS दोनों प्लेटफ़ॉर्म पर उपलब्ध है।
- इसे संक्षेप में MS Word कहा जाता है।
- इसका पहला संस्करण 1983 में “Multi-Tool Word” नाम से जारी हुआ था।
- नवीनतम संस्करण — Microsoft Word 2021 / Word 365
Microsoft Word के Versions
| संस्करण (Version) | वर्ष (Year) | विशेषता (Feature) |
| Word 1.0 | 1983 | पहला संस्करण (MS-DOS) |
| Word 2.0 | 1985 | Windows के लिए पहला Word |
| Word 6.0 | 1993 | Common numbering system |
| Word 97 | 1997 | Office Assistant (Clippy) |
| Word 2003 | 2003 | XML format |
| Word 2007 | 2007 | Ribbon Interface |
| Word 2010 | 2010 | File tab (Backstage view) |
| Word 2013 | 2013 | Cloud Save (SkyDrive) |
| Word 2016 | 2016 | Real-time collaboration |
| Word 2019 | 2019 | Translation Tools |
| Word 2021 / 365 | 2021 | AI-based Editor, Modern UI |
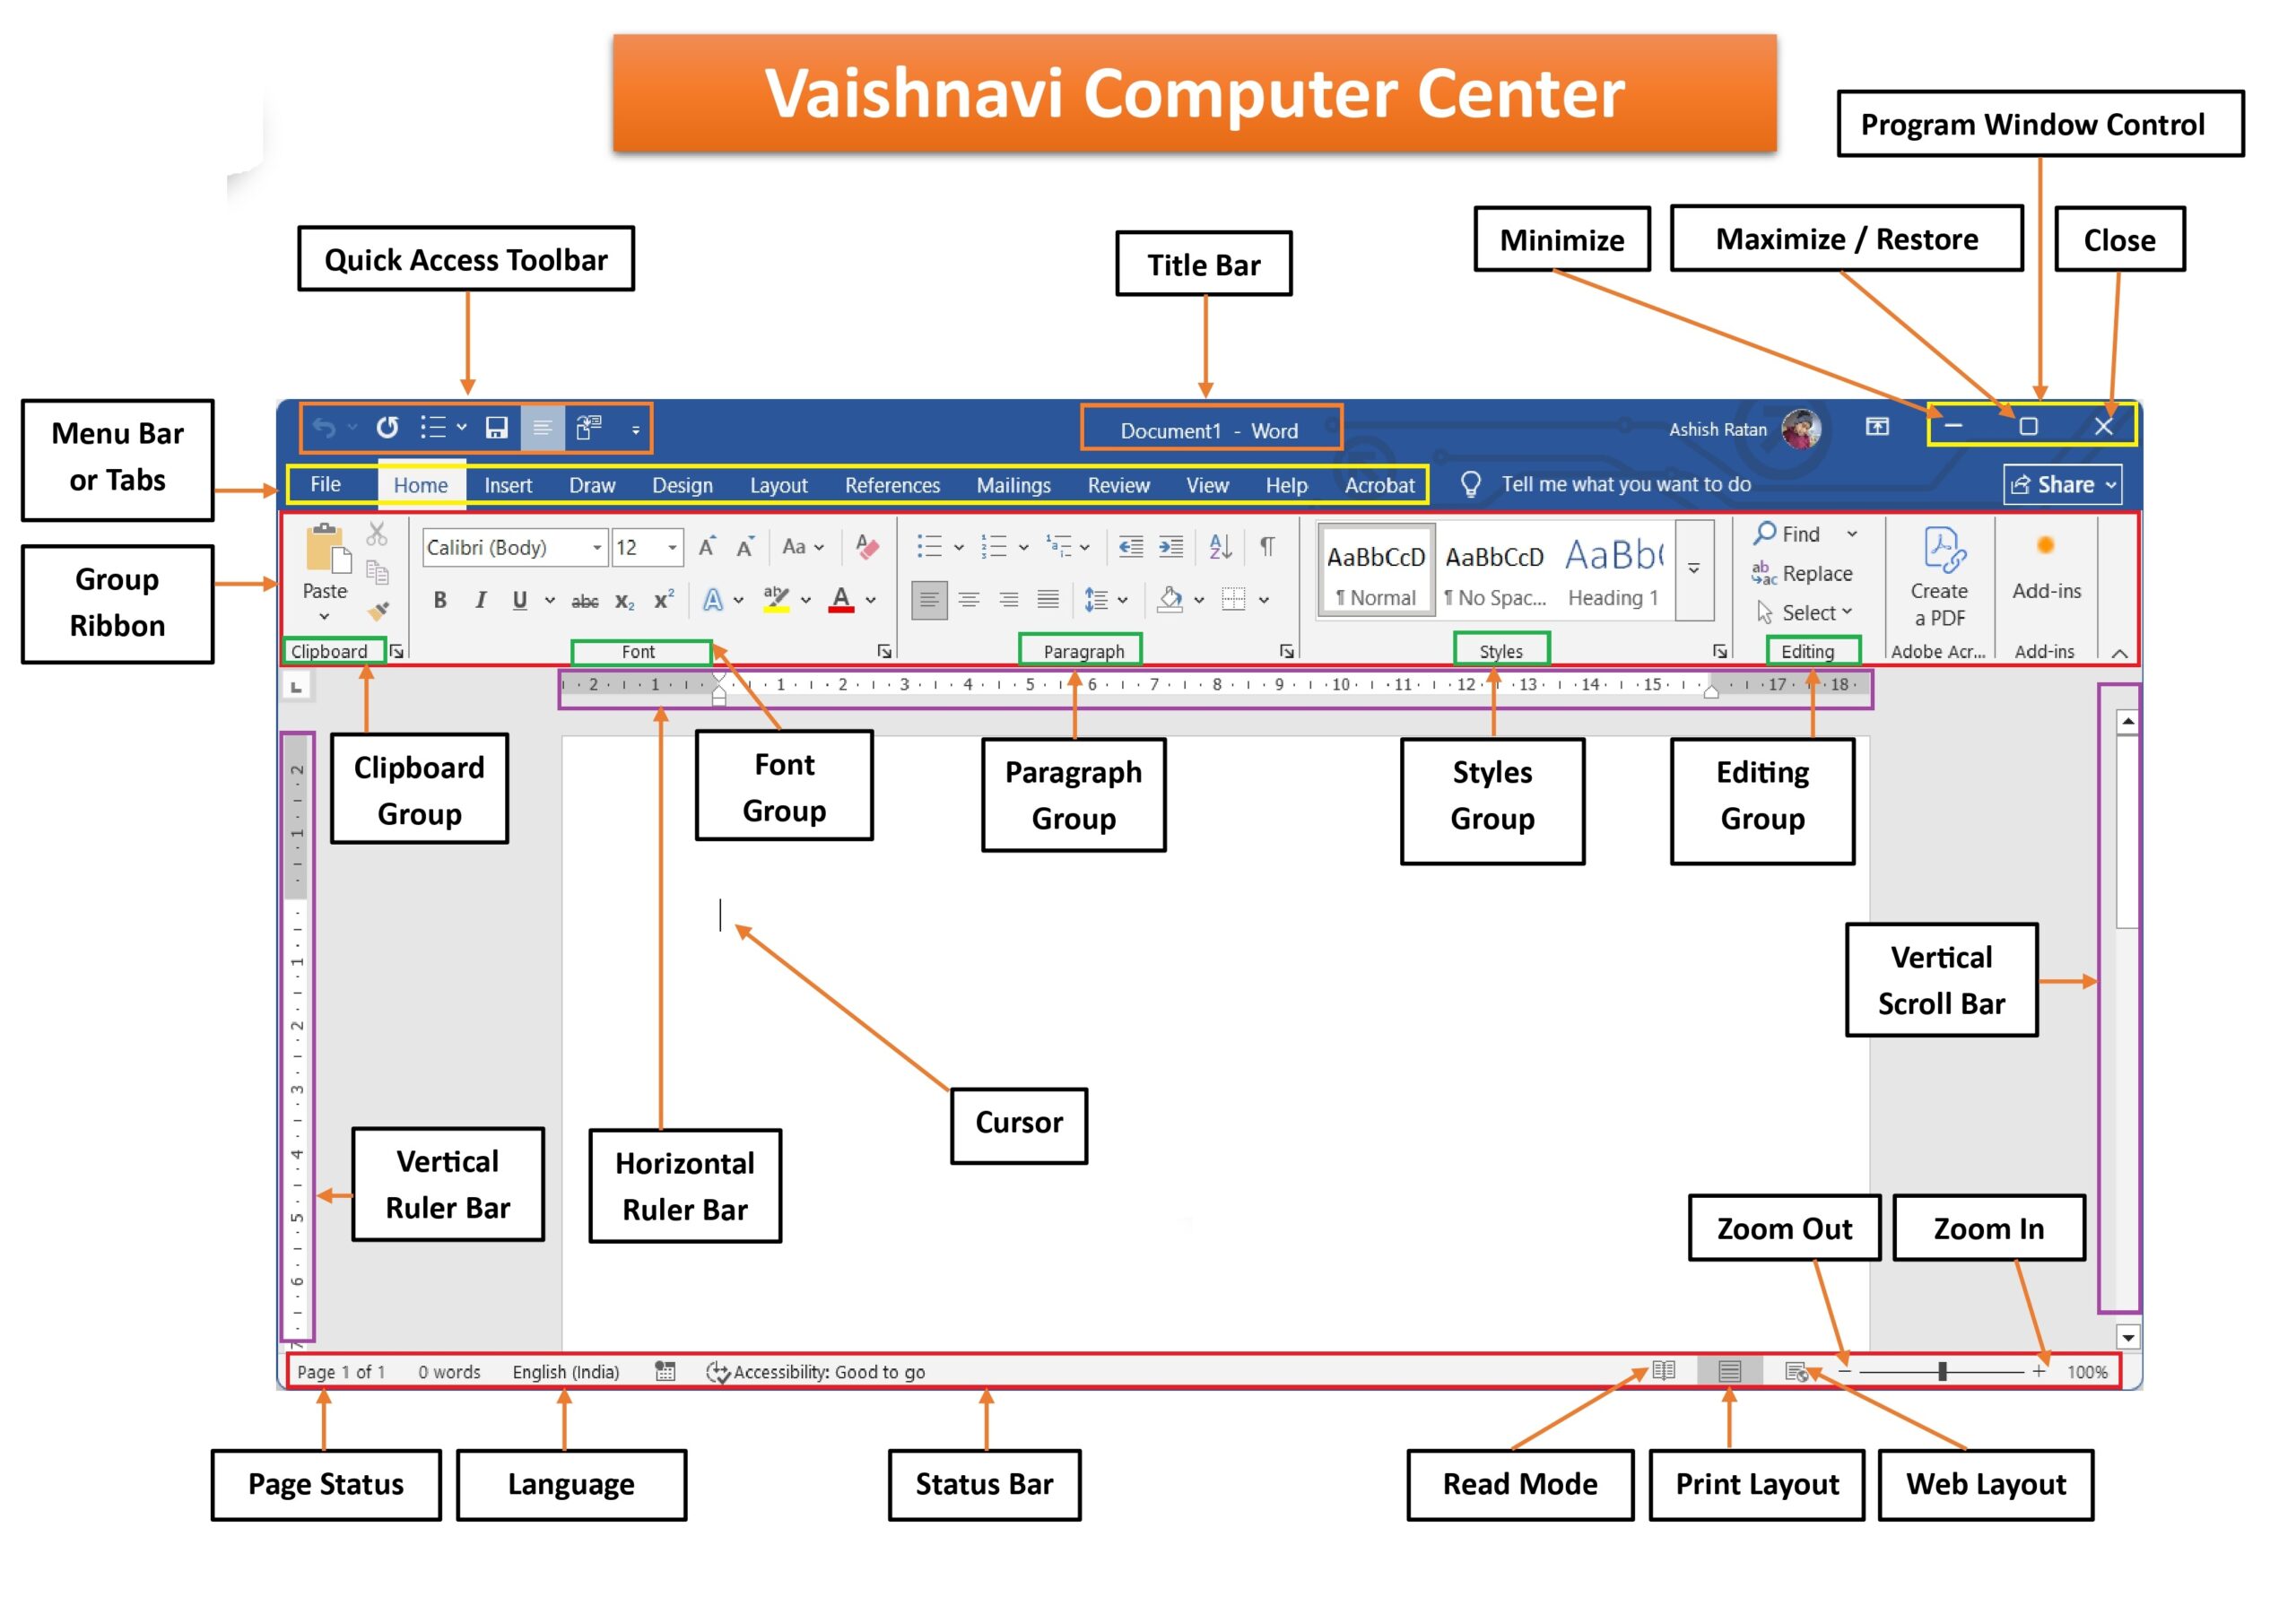
Microsoft Word Interface (Main Window)
जब हम Word खोलते हैं, तो एक “Interface” दिखाई देता है, जिसमें कई भाग होते हैं:
- Title Bar — Document का नाम और Program का नाम दिखाता है।
- Quick Access Toolbar — Save, Undo, Redo जैसे Common Tools देता है।
- Ribbon Tabs — Home, Insert, Design, Layout आदि Tabs होते हैं।
- Groups & Commands — प्रत्येक Tab में अलग-अलग Group (जैसे Font, Paragraph).
- Status Bar — Word Count, Page Number आदि दिखाता है।
- Scroll Bars & Zoom Slider — Document देखने व Zoom करने के लिए।’
💡 Tip: “Ribbon” Interface MS Word 2007 से शुरू हुआ था।
Document Management
| कार्य | विवरण |
| New Document | File → New → Blank Document |
| Open Document | File → Open → Choose file |
| Save Document | Ctrl + S या File → Save |
| Save As | File → Save As → New Name |
| Close Document | File → Close |
| Exit Word | Alt + F4 |
File Formats
- .doc – MS Word 2003 और पुराने versions में बनती है।
- .docx – MS Word 2007 और बाद के versions में बनती है।
- .dotx – Template file
- .pdf – Portable format (Save As PDF)
View Modes
Word में Document को देखने के लिए विभिन्न View Modes होते हैं:
| View Type | कार्य |
| Print Layout | सामान्य View (Default), जैसा प्रिंट में दिखेगा। |
| Read Mode | Full-screen reading mode |
| Web Layout | Internet Page जैसा View |
| Outline View | Headings के रूप में संरचना |
| Draft View | Simple text editing view |

Starting & Exiting Microsoft Word
Start करने के तरीके:
- Method 1: Start → All Programs → Microsoft Office → Microsoft Word
- Method 2: Start बटन के Search bar में Word लिखें। आपको Word icon दिखेगा उस पर क्लिक करें।
- Method 3: Desktop पर यदि कोई Word फ़ाइल है तो उस पर Double क्लिक करें।
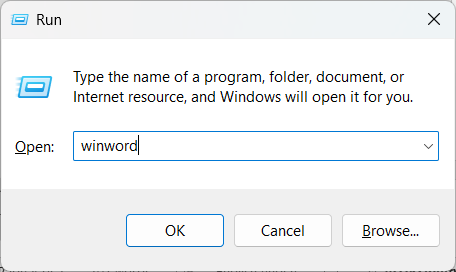
- Method 4: Windows Key + R बटन को एकसाथ दबाएँ।
- अब winword टाइप करें
- Enter बटन दबाएँ या माऊस से OK पर क्लिक करें।
- MS Word खुल जाएगा।
💡 Tip: Method 4 परीक्षाओं में अक्सर पूंछा जाता है।
Exit करने के तरीके:
- Method 1: File टैब पर जाएँ और Close/Exit पर क्लिक करें।
- Method 2: Alt + F4 बटन को एकसाथ दबाएँ।
- Method 3: Word के दायें तरफ ऊपर कोर्नर में, Close Button (X) को क्लिक करें।
- Microsoft Word बंद हो जाएगा।
Advantages of Word Processing
- Editing आसान है
- Formatting सुविधाजनक है
- Time-saving and Cost-effective
- Error-free Proofing tools
- Multimedia Support (Images, Charts, etc.)
- Reusability और Sharing आसान
- Data सुरक्षित (Password Protected Documents)
Quick Summary (For Revision)
| कार्य | Shortcut |
| New Document | Ctrl + N |
| Open Document | Ctrl + O |
| Save Document | Ctrl + S |
| Print Document | Ctrl + P |
| Close Document | Ctrl + W |
| Undo | Ctrl + Z |
| Redo | Ctrl + Y |
| Help | F1 |
Practical Task – Unit 1✍️Task (कार्य):
|
Unit 2: Text Operations
यह यूनिट Microsoft Word के सबसे ज़रूरी practical हिस्सों में से एक है, क्योंकि यहीं से typing, editing, formatting की असली शुरुआत होती है।
Text Operations का अर्थ
Word Processing में Text Operation का मतलब है — किसी Document में Text को टाइप करना, चुनना (Select करना), हटाना, कॉपी करना, स्थान बदलना (Move करना) और उसकी विभिन्न Editing Activities करना।
यह यूनिट आपको “Document Editing Expert” बना देगा।
Typing Rules (टाइपिंग के नियम)
- Typing शुरू करने से पहले Cursor (Blinking Line) की स्थिति देखें।
- Typing हमेशा Cursor के स्थान से शुरू होती है।
- Word में Auto Word Wrap सुविधा होती है — लाइन के अंत पर अपने-आप अगली पंक्ति में चला जाता है।
- Typing में Backspace (पीछे से Delete) और Delete Key (आगे से Delete) का सही उपयोग करें।
- Enter Key का प्रयोग नए Paragraph के लिए करें, न कि हर Line के लिए।
- Shift Key — Capital Letter या Symbols टाइप करने के लिए।
- हिंदी टाइपिंग के लिए “Mangal Font” या “Kruti Dev” का प्रयोग करें (इनपुट के लिए Indic Tool या Google Input Tool).
Text Selection (टेक्स्ट चयन की विधियाँ)
Word में Editing करने से पहले Text को Select करना आवश्यक है।
Text को Select करने के कई तरीके हैं
| कार्य | तरीका / Shortcut |
| एक शब्द चुनना | उस पर Double Click करें |
| पूरा वाक्य चुनना | Ctrl + Click करें |
| पूरा Paragraph | Triple Click करें |
| पूरी पंक्ति (Line) | बाएँ Margin में Click करें |
| पूरा Document | Ctrl + A |
| एक अक्षर बाएँ/दाएँ | Shift + ← / → |
| एक शब्द बाएँ/दाएँ | Ctrl + Shift + ← / → |
💡 Tip: Selection के बाद Text पर कोई भी Formatting, Copy या Delete किया जा सकता है।
Editing Operations (संपादन क्रियाएँ)
Editing का अर्थ है — पहले से टाइप किए गए Text को संशोधित करना। मुख्य Editing Tools ये हैं 👇
| कार्य | Shortcut | विवरण |
| Cut | Ctrl + X | चयनित Text हटाकर Clipboard में भेजना |
| Copy | Ctrl + C | चयनित Text की Copy बनाना |
| Paste | Ctrl + V | Clipboard का Text पेस्ट करना |
| Undo | Ctrl + Z | पिछला कार्य रद्द करना |
| Redo / Repeat | Ctrl + Y | Undo किए गए कार्य को वापस लाना |
| Delete | Delete / Backspace | Text हटाना |
💡 Tip: Cut & Paste का उपयोग “Move Text” के रूप में भी किया जा सकता है।
Clipboard (क्लिपबोर्ड)
Clipboard एक अस्थायी मेमोरी क्षेत्र होता है जहाँ Cut या Copy किया गया Text/Item अस्थायी रूप से संग्रहित रहता है।
Word में “Office Clipboard” 24 Items तक एक साथ Save कर सकता है।
Access करने का तरीका: Home Tab → Clipboard Group → Clipboard Launcher (Arrow Icon)
Features:
- Multiple Items Store करता है
- Paste All या Clear All सुविधा
- Recently Copied List दिखाई देती है
Find and Replace (खोजें और बदलें)
Word में किसी शब्द को बार-बार ढूँढने या बदलने के लिए यह सुविधा उपयोग होती है।
Shortcut:
- Find → Ctrl + F
- Replace → Ctrl + H
Find करने की विधि:
- Home Tab → Editing Group → Find
- सर्च बॉक्स में शब्द डालें
- “Find Next” से अगला मिलान देखें

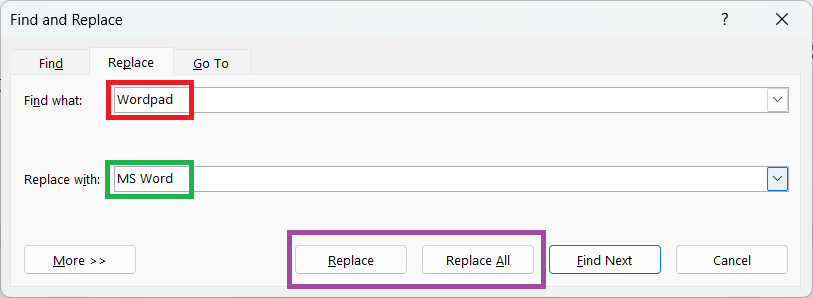
Replace करने की विधि:
- Ctrl + H दबाएँ
- “Find what” में पुराना शब्द डालें
- “Replace with” में नया शब्द डालें
- “Replace All” दबाएँ (सभी जगह बदलाव के लिए)
Example: Find: “Wordpad” → Replace with: “MS Word”. अब पूरे Document में Wordpad की जगह MS Word आ जाएगा।
Moving and Copying Text Using Mouse
- चयन करें Text को
- उसे Drag करके जहाँ चाहिए वहाँ Drop करें → यह Move कहलाता है।
- अगर Copy करना हो तो Ctrl Key दबाकर Drag करें।
💡 Tip: “Drag + Drop” method Keyboard के बजाय तेज़ और आसान होती है।
Undo, Redo, Repeat (पुनः क्रिया)
- Undo (Ctrl + Z) → पिछली गलती को वापस लेना
- Redo (Ctrl + Y) → Undo को फिर से लागू करना
- Repeat (F4) → पिछली क्रिया को दोहराना
Example: आपने एक Text Bold किया → अब किसी और Text को भी Bold करना है → तो F4 दबाएँ।
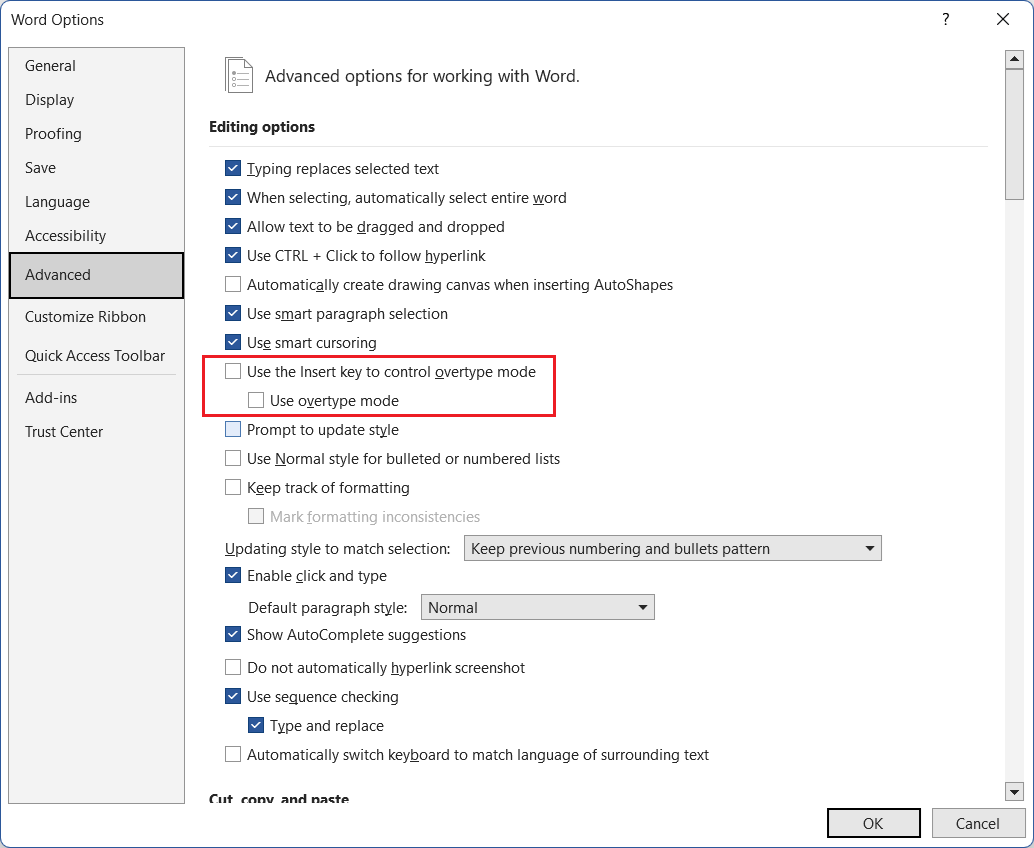
Insert Mode vs Overwrite Mode
Word में दो Typing Mode होते हैं:
| Mode | कार्य |
| Insert Mode | नया Text पुराने Text को आगे सरका देता है (Default Mode) |
| Overwrite Mode | नया Text पुराने Text को Replace कर देता है |
💡 Toggle Key: Press Insert Key (Ins) to switch between them.
Delete Options
| कार्य | विवरण |
| Backspace | Cursor के पीछे का Text हटाता है |
| Delete | Cursor के आगे का Text हटाता है |
| Ctrl + Backspace | पूरा शब्द पीछे से हटाता है |
| Ctrl + Delete | पूरा शब्द आगे से हटाता है |
Common Mistakes and Fixes
| समस्या | समाधान |
| Text Replace हो रहा है | Overwrite Mode On है → “Insert” दबाएँ |
| Paste नहीं हो रहा | Clipboard खाली है |
| Replace गलत शब्द बदल गया | Undo (Ctrl + Z) करें |
| Copy के बाद Text गायब | Cut किया था, Copy नहीं |
Quick Summary (Unit 2 Revision Table)
| कार्य | Shortcut |
| Select All | Ctrl + A |
| Cut | Ctrl + X |
| Copy | Ctrl + C |
| Paste | Ctrl + V |
| Find | Ctrl + F |
| Replace | Ctrl + H |
| Undo | Ctrl + Z |
| Redo | Ctrl + Y |
| Repeat | F4 |
Practical Task – Unit 2✍️Task (कार्य):
|
Unit 3: Text Formatting
यह यूनिट आपके ADCA Practical Exam में अक्सर सीधे प्रश्नों व कार्यों (Tasks) के रूप में आता है — जैसे “Text को Bold करें”, “Paragraph Align करें”, “Bullets लगाएँ”, “Shading दें”, आदि।
इसलिए मैंने इसे Theory + Practical + Summary + Shortcuts के मिश्रण के रूप में तैयार किया है।
Text Formatting क्या है?
Text Formatting का अर्थ है — किसी Document में Text को सुंदर, आकर्षक और पढ़ने योग्य बनाना।
Formatting से Document Professional और Organized दिखता है।
उदाहरण: Font बदलना, Size बढ़ाना, Color लगाना, Text Align करना, Spacing बदलना आदि।
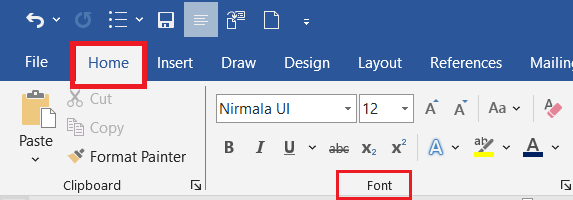
Font Formatting (अक्षर स्वरूपण)
Font Formatting Text के “Character Level” पर लागू होता है। इसके लिए Word में “Home Tab → Font Group” का उपयोग होता है।
मुख्य Font Formatting विकल्प
| कार्य | Shortcut | विवरण |
| Bold | Ctrl + B | Text को मोटा (Dark) बनाता है |
| Italic | Ctrl + I | Text को तिरछा बनाता है |
| Underline | Ctrl + U | Text के नीचे Line खींचता है |
| Strikethrough | None | Text के बीच Line लगाता है |
| Superscript | Ctrl + Shift + + | Text को ऊपर उठाता है (जैसे x²) |
| Subscript | Ctrl + = | Text को नीचे लाता है (जैसे H₂O) |
| Change Case | Shift + F3 | Upper / Lower / Sentence Case बदलता है |
| Font Color | Alt + H + FC | Text का रंग बदलता है |
| Highlight | Alt + H + I | Text को Highlight करता है |
| Clear Formatting | Ctrl + Spacebar | Text से सभी Formatting हटाता है |
💡 Tip: Font Dialog Box खोलने के लिए → Ctrl + D दबाएँ।
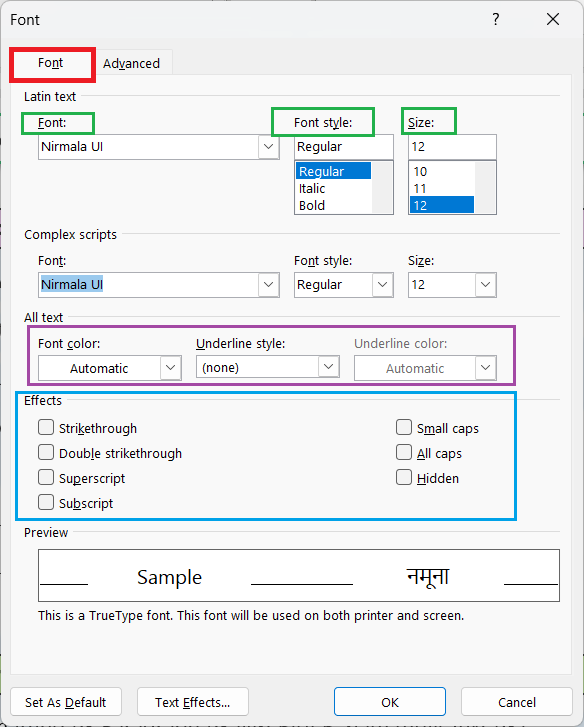
Font Dialog Box Options
Font Dialog Box में Advanced Formatting की सुविधाएँ होती हैं:
- Font, Font Style, Size
- Font Color, Underline Style, Underline Color
- Effects: Strikethrough, Double Strikethrough, Shadow, Outline, Emboss, Small Caps, All Caps
Example:
- “All Caps” → Text को सभी Capital Letters में दिखाता है।
- “Hidden” → Text Print में नहीं दिखेगा।
Paragraph Formatting (अनुच्छेद स्वरूपण)
👉 Paragraph Formatting पूरे Paragraph पर लागू होती है, न कि केवल Text पर।
👉 यह “Home Tab → Paragraph Group” में होती है।
Alignment (संतुलन)
| Alignment Type | Shortcut | विवरण |
| Left Align | Ctrl + L | Text को बाएँ किनारे से जोड़ता है |
| Center Align | Ctrl + E | Text को बीच में लाता है |
| Right Align | Ctrl + R | Text को दाएँ किनारे से जोड़ता है |
| Justify | Ctrl + J | Text को दोनों किनारों पर संतुलित करता है |
Example: Report और Letter में आमतौर पर Justify Alignment प्रयोग होता है।

Indentation (अन्तर / Text Margin Control)
Indentation का उपयोग Paragraph के अंदर Text को थोड़ा अंदर खिसकाने के लिए किया जाता है।
| प्रकार | विवरण |
| Left Indent | Paragraph बाएँ Margin से अंदर जाएगा |
| Right Indent | Paragraph दाएँ Margin से अंदर जाएगा |
| First Line Indent | केवल पहली पंक्ति अंदर जाएगी |
| Hanging Indent | पहली पंक्ति छोड़कर बाकी सभी अंदर जाएँगी |
Shortcut:
- Increase Indent → Ctrl + M
- Decrease Indent → Ctrl + Shift + M
Line & Paragraph Spacing (पंक्ति और अनुच्छेद अंतराल)
यह सुविधा Text की पंक्तियों के बीच की दूरी तय करती है।
| Spacing Type | Shortcut | विवरण |
| Single | Ctrl + 1 | सामान्य Spacing |
| 1.5 Lines | Ctrl + 5 | अधिक दूरी |
| Double | Ctrl + 2 | सबसे ज़्यादा दूरी |
| Paragraph Space Before | Layout → Spacing → Before | |
| Paragraph Space After | Layout → Spacing → After |
💡 Tip: Academic Documents में अक्सर 1.5 Line Spacing प्रयोग होती है।
Bullets and Numbering (बिंदु व क्रमांकित सूची)
Bullets और Numbering का प्रयोग List बनाने के लिए किया जाता है।
| प्रकार | विवरण |
| Bullets | बिंदु (●, ○, ✔ आदि) लगाता है |
| Numbering | 1, 2, 3 या a, b, c आदि क्रमांक लगाता है |
| Multilevel List | List के भीतर Sub-list बनाता है |
Shortcut:
- Alt + H + U → Bullets
- Alt + H + N → Numbering
💡 Practical Tip: Bullets का उपयोग “Features” या “Advantages” जैसे Points में करें।
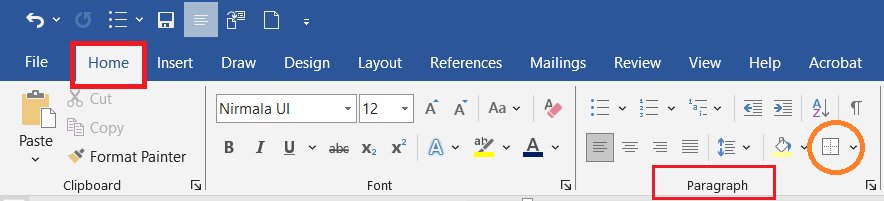
Borders and Shading (सीमा और छायांकन)
यह सुविधा Paragraph या Text को Highlight करने के लिए होती है।
👉 Access: Home Tab → Paragraph Group → Borders Button
| कार्य | विवरण |
| Border | Text/Paragraph के चारों ओर Line लगाना |
| Shading | Background Color देना |
| No Border | Line हटाना |
| Custom Border | केवल चयनित किनारों पर Line लगाना |
Example: Headings को Attractive बनाने के लिए Shading व Borders का उपयोग करें।
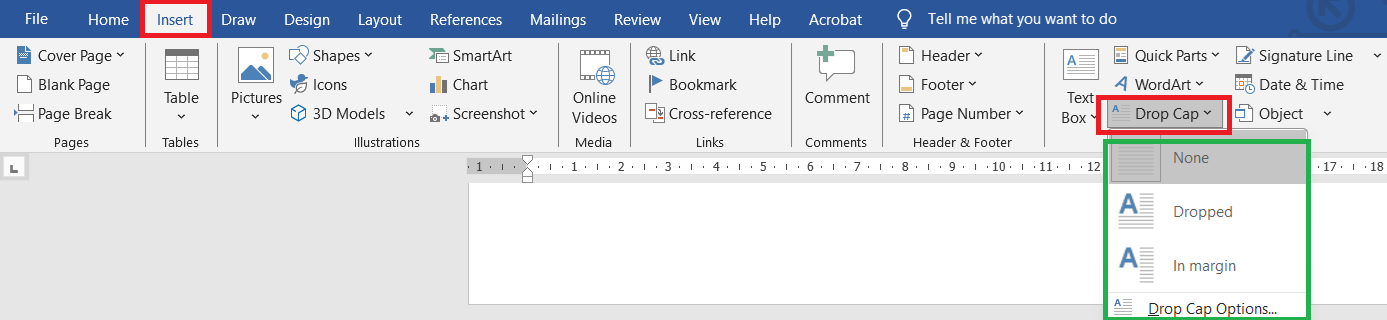
Drop Cap
👉 Drop Cap का प्रयोग Paragraph की पहली अक्षर को बड़ा और Decorative बनाने के लिए किया जाता है।
Insert Tab → Drop Cap → Dropped / In Margin
Example: “Microsoft Word is a popular software…” यहाँ “M” बड़ा दिखेगा।
Text Effects and Typography
Design Tab में “Text Effects” विकल्प से Text को Modern Look दिया जा सकता है — जैसे Shadow, Reflection, Glow, Bevel, 3D Rotation आदि।

💡 Tip: ध्यान रखें — अधिक Decoration Document को Unprofessional बना सकता है।
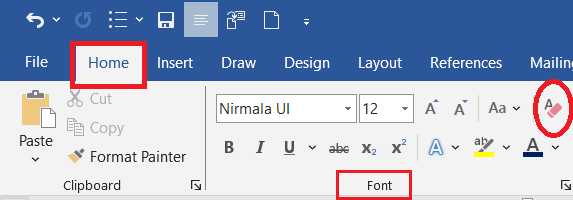
Clear Formatting
यदि Text पर कई Formatting लागू हो चुकी है और आप उसे Normal करना चाहते हैं —
Shortcut: Ctrl + Spacebar
👉 या Home Tab → Clear All Formatting Icon (An eraser)
Quick Summary (Unit 3 Revision Table)
| कार्य | Shortcut |
| Bold | Ctrl + B |
| Italic | Ctrl + I |
| Underline | Ctrl + U |
| Left Align | Ctrl + L |
| Center Align | Ctrl + E |
| Right Align | Ctrl + R |
| Justify | Ctrl + J |
| Line Spacing (1.5) | Ctrl + 5 |
| Double Spacing | Ctrl + 2 |
| Change Case | Shift + F3 |
| Clear Formatting | Ctrl + Spacebar |
| Increase Indent | Ctrl + M |
Practical Task – Unit 3✍️Task (कार्य):
|
Unit 4: Page Setup and Printing
यह यूनिट ADCA Course में Theory + Practical दोनों रूप में बहुत ज़्यादा पूछी जाती है, क्योंकि इससे सीधे Document के Layout, Presentation और Printing Output नियंत्रित होते हैं।
Page Setup क्या है?
Page Setup का अर्थ है — किसी Document के पृष्ठ (Page) को प्रिंटिंग या प्रस्तुतिकरण (Presentation) के लिए व्यवस्थित करना।
इसमें पृष्ठ का आकार, दिशा (Orientation), मार्जिन, हेडर-फूटर, पेज नंबर आदि सेट किए जाते हैं।
सरल शब्दों में:
Page Setup का काम है — “Document को प्रिंट के लिए तैयार रूप देना।”
Page Layout Tab (Page Setup के लिए प्रमुख Tab)
MS Word में Page Layout / Layout Tab में Page Setup से जुड़ी सभी Commands होती हैं।
मुख्य समूह (Groups):
- Page Setup
- Paragraph
- Arrange

Margins (किनारे)
Margin वह खाली स्थान है जो पृष्ठ के चारों ओर छोड़ा जाता है।
| प्रकार | विवरण |
| Top Margin | पृष्ठ के ऊपर का खाली स्थान |
| Bottom Margin | पृष्ठ के नीचे का खाली स्थान |
| Left Margin | बाएँ ओर का स्थान |
| Right Margin | दाएँ ओर का स्थान |
Access: Layout Tab → Margins → Choose Preset or Custom Margins
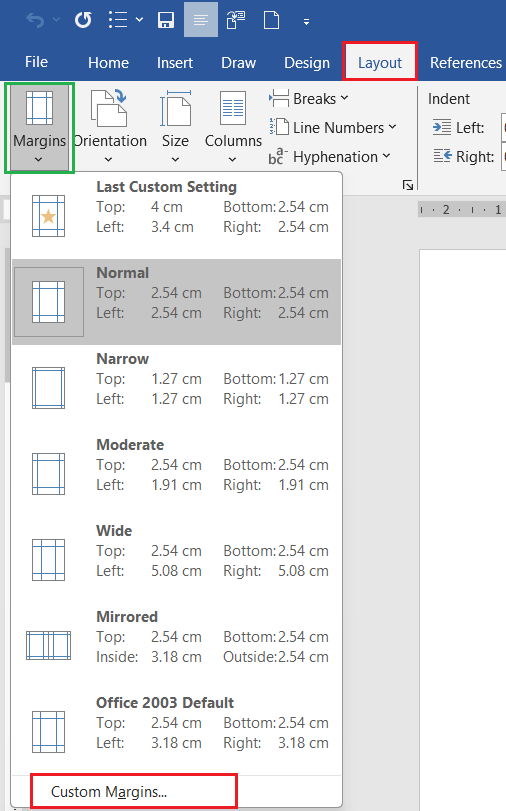
Shortcut: Alt + P + M
💡 Tip: सामान्यतः
- Top/Bottom: 1”
- Left/Right: 1.25”
Page Orientation (पृष्ठ की दिशा)
Orientation से तय होता है कि Page ऊँचाई में होगा या चौड़ाई में।
| प्रकार | विवरण |
| Portrait | लंबवत (Vertical) — Default |
| Landscape | क्षैतिज (Horizontal) |
Access: Layout Tab → Orientation → Portrait / Landscape
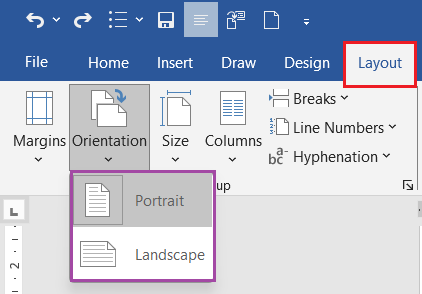
Shortcut: Alt + P + O
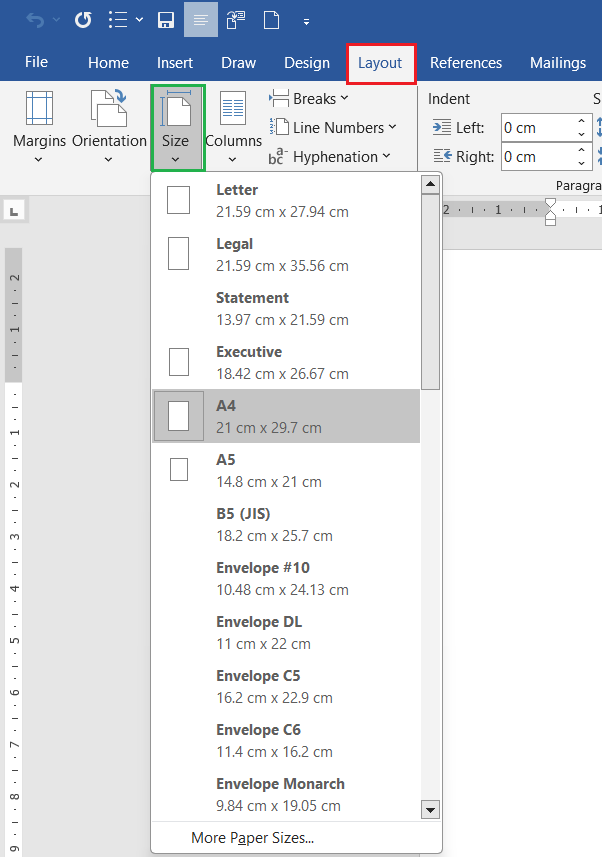
Paper Size (कागज़ का आकार)
Word में Document को प्रिंट करने के लिए उचित Paper Size चुनना आवश्यक होता है।
| सामान्य आकार | माप |
| A4 | 21 × 29.7 cm (Default) |
| Letter | 21.59 × 27.94 cm |
| Legal | 21.59 × 35.56 cm |
Shortcut: Alt + P + S
Access: Layout Tab → Size → Select Required Paper Size
Page Break (पृष्ठ विभाजन)
Page Break का उपयोग एक Page समाप्त करके नया Page शुरू करने के लिए किया जाता है।
Shortcut: Ctrl + Enter
Menu: Insert Tab → Page Break
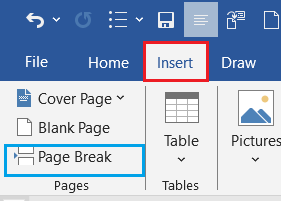
💡 Practical Tip: जब Document लंबा हो और किसी नए Section को नए Page से शुरू करना हो तो Page Break का प्रयोग करें।
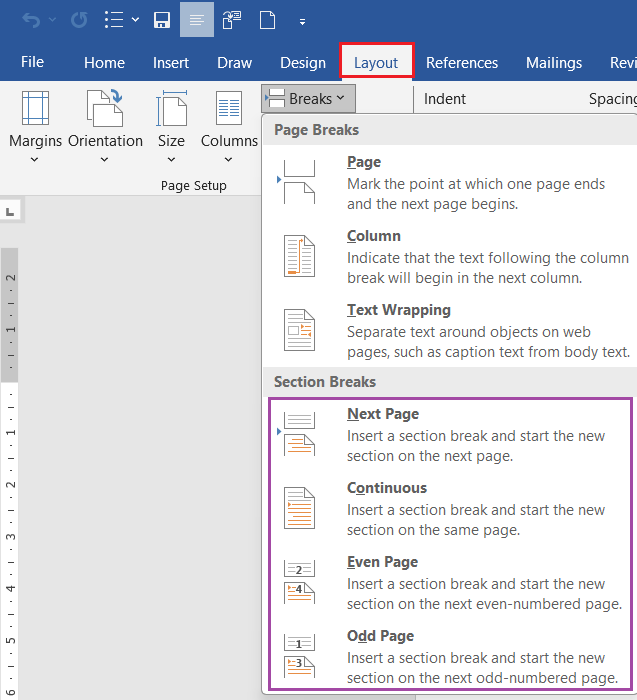
Section Breaks (खंड विभाजन)
Section Breaks का प्रयोग Document के अंदर विभिन्न Layout बनाने के लिए किया जाता है। जैसे — पहले पेज का Orientation Portrait और दूसरे पेज का Landscape रखना।
| प्रकार | उपयोग |
| Next Page | अगला Section नए Page से शुरू |
| Continuous | Section उसी Page में |
| Even Page | अगले Even (सम) Page से शुरू |
| Odd Page | अगले Odd (विषम) Page से शुरू |
Menu: Layout → Breaks → Section Breaks
Header and Footer (शीर्षलेख और पादलेख)
Header और Footer का उपयोग हर Page पर समान जानकारी (जैसे Page No., Title, Date, Logo) देने के लिए होता है।
| भाग | स्थान | उपयोग |
| Header | Page के ऊपर | शीर्ष सूचना (जैसे Name, Title) |
| Footer | Page के नीचे | तिथि या Page Number |
Menu: Insert Tab → Header/Footer
Shortcut: Alt + N + H / Alt + N + O

Close Header/Footer: Close Header and Footer पर क्लिक करने से Header/ Footer Window बंद हो जाएगी। या Esc Key दबाने से भी Header/Footer Window बंद हो जाएगी।

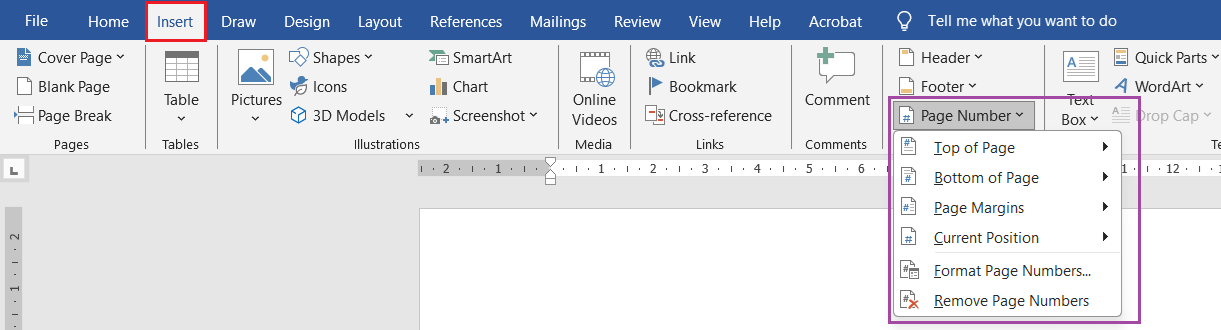
Page Numbering (पृष्ठ क्रमांक)
Page Number से प्रत्येक पृष्ठ को क्रमांकित किया जा सकता है।
Menu: Insert Tab → Page Number
Options:
- Top of Page
- Bottom of Page
- Page Margins
- Current Position
Shortcut: Alt + N + NU
Example: आप Page Number को Header या Footer में भी जोड़ सकते हैं।
Page Color, Borders and Watermark
🔸 Page Color:
- Design Tab → Page Color → चुनें कोई रंग
🔸 Page Borders:
- Design Tab → Page Borders → Box, Shadow, 3D, Custom Styles
🔸 Watermark:
- Design Tab → Watermark → Confidential / Draft या Custom Text
Example: Exam में “Confidential” Watermark लगाना एक Common Task होता है।
Menu: Design Tab → Page Background Group

Columns (स्तम्भ)
Newspaper या Magazine शैली का Document बनाने के लिए Columns का प्रयोग किया जाता है।
| प्रकार | विवरण |
| One | Single Column (Default) |
| Two | दो कॉलम में Text |
| Three | तीन कॉलम में Text |
| Left / Right | एक बड़ा + एक छोटा कॉलम |
Menu: Layout → Columns → Select Type
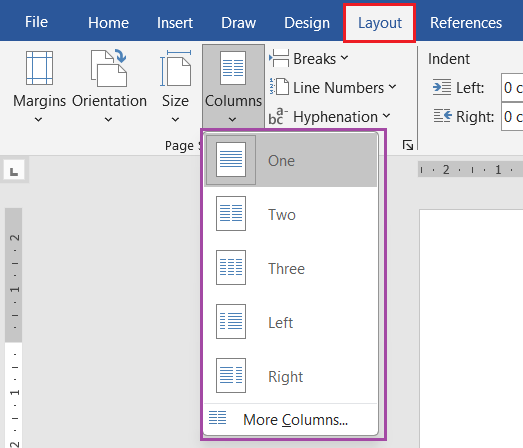
Shortcut: Alt + P + J
💡 Tip: Columns में Text Flow अपने-आप एक कॉलम से दूसरे कॉलम में जाता है।
Page Background
Page Background Document को आकर्षक बनाता है। इसमें शामिल हैं —
- Page Color
- Watermark
- Page Borders
💡 Tip: Official Documents में हल्का ग्रे या ब्लू Background बेहतर लगता है।
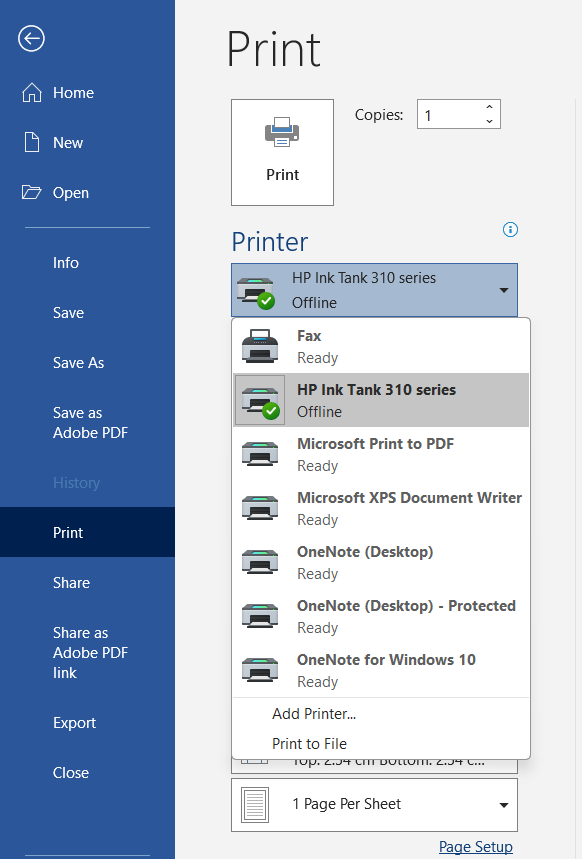
Print Preview and Printing
Print करने से पहले हमेशा Print Preview देखना चाहिए।
Access: File → Print (या Ctrl + P)
यहाँ से आप देख सकते हैं:
- Printer Selection
- Page Range (All / Custom Pages)
- Copies
- Orientation
- Paper Size
- Margins Adjustments
Shortcut: Ctrl + P
💡 Tip: “Print to PDF” विकल्प से Document को PDF के रूप में Save किया जा सकता है।
Exporting to PDF
MS Word में सीधे PDF Format में Save करने की सुविधा होती है।
Steps:
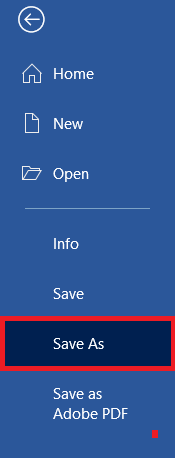
- File → Save As
- “Save as type” → PDF चुनें
- Save करें
Shortcut (Quick): Alt + F + A + F + Enter
Printing Options Summary
| विकल्प | विवरण |
| All Pages | पूरे Document को प्रिंट करता है |
| Current Page | सिर्फ वर्तमान Page |
| Custom Range (1,3,5) | चयनित Pages |
| Print One Sided / Both Sided | Single / Duplex Printing |
| Pages per Sheet | 2 या 4 Pages एक शीट पर |
💡 Tip: “Manual Duplex” विकल्प से दोनों तरफ प्रिंट किया जा सकता है।
Quick Summary (Unit 4 Revision Table)
| कार्य | Shortcut / Menu |
| Margins | Alt + P + M |
| Orientation | Alt + P + O |
| Size | Alt + P + S |
| Page Break | Ctrl + Enter |
| Header/Footer | Alt + N + H / Alt + N + O |
| Page Number | Alt + N + NU |
| Print Preview | Ctrl + P |
| Save as PDF | Alt + F + A + F |
Practical Task – Unit 4✍️Task (कार्य):
Save As → Unit4_PageSetup.docx
|
Unit 5: Working with Tables
यह यूनिट MS Word की “Formatting + Data Presentation” क्षमताओं को दर्शाता है। आप इससे सीखेंगे कि कैसे Word Document में डेटा को सारणी (Table) के रूप में व्यवस्थित किया जाता है।
Table क्या है?
Table (तालिका) एक ऐसा ढांचा है जिसमें पंक्तियों (Rows) और स्तंभों (Columns) में डेटा को व्यवस्थित किया जाता है।
Word में Table का उपयोग मुख्यतः डेटा को तुलना, सूची या रिपोर्ट के रूप में दिखाने के लिए किया जाता है।
उदाहरण:
| नाम | कक्षा | अंक |
| रमा | 10वीं | 88 |
| अजय | 9वीं | 76 |
Table बनाने के तरीके (Methods of Creating Table)
Word में Table बनाने के 4 प्रमुख तरीके हैं 👇
| विधि | विवरण |
| 1. Insert Table | Rows और Columns की संख्या चुनकर Table बनाना |
| 2. Draw Table | माउस से बॉक्स खींचकर Custom Table बनाना |
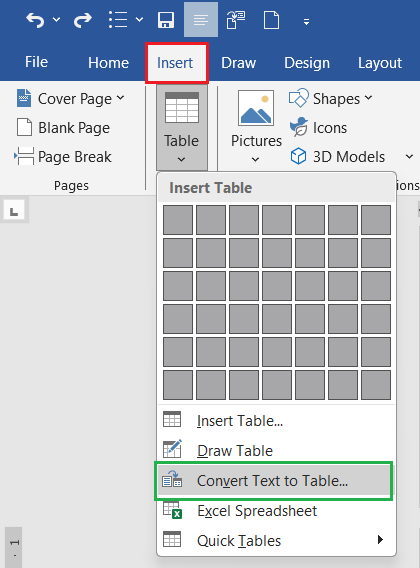
| 3. Convert Text to Table | पहले से लिखे Text को Table में बदलना |
| 4. Quick Tables | पहले से बने Template Tables का उपयोग |
Method 1 – Insert Table
Steps:
- Cursor को जहाँ Table चाहिए वहाँ रखें
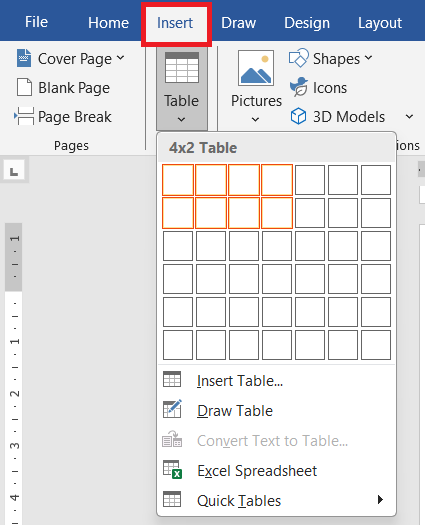
- Insert Tab → Table → Insert Table
- Rows और Columns की संख्या तय करें
- OK पर क्लिक करें
Shortcut: Alt + N + T
💡 Tip: आप Grid (Boxes) पर Mouse Hover करके भी Table Size चुन सकते हैं (जैसे 4×3 Table)
Method 2 – Draw Table
यह तरीका उपयोगी है जब आपको Uneven Columns या Custom Cell Sizes चाहिए।
Steps:
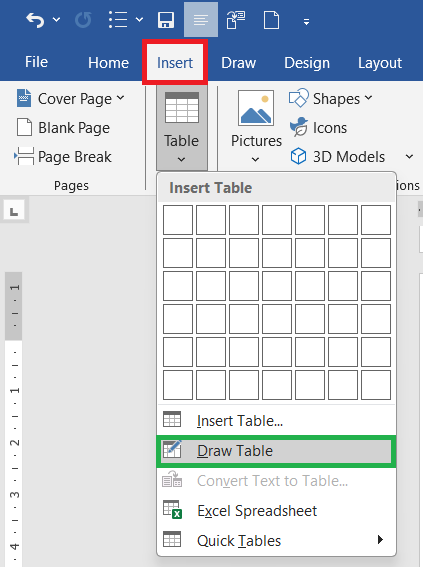
- Insert Tab → Table → Draw Table
- अब Cursor Pencil बन जाएगा
- Mouse से Table का Outline और Cells खींचें
- Eraser Tool से Cell मिटा सकते हैं
💡 Tip: यह तरीका “Form Layout” या “Certificate Design” में बहुत उपयोगी होता है।
Method 3 – Convert Text to Table
अगर आपने Data पहले से Typing किया है (Tabs या Commas से अलग-अलग), तो उसे Table में बदला जा सकता है।
Steps:
- Text Select करें
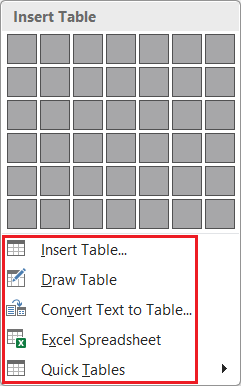
- Insert Tab → Table → Convert Text to Table
- “Separate Text At” में Tab / Comma / Paragraph चुनें
- OK पर क्लिक करें
Example:
Name, Class, Marks
Ravi, 10, 80
Sita, 9, 85
Convert Text to Table पर क्लिक करने पर Table में बदल जाएगा।
Method 4 – Quick Tables
Word में कुछ Ready-Made Tables पहले से उपलब्ध होती हैं जैसे – Calendar, Tabular List आदि।
Steps: Insert Tab → Table → Quick Tables → Select Template
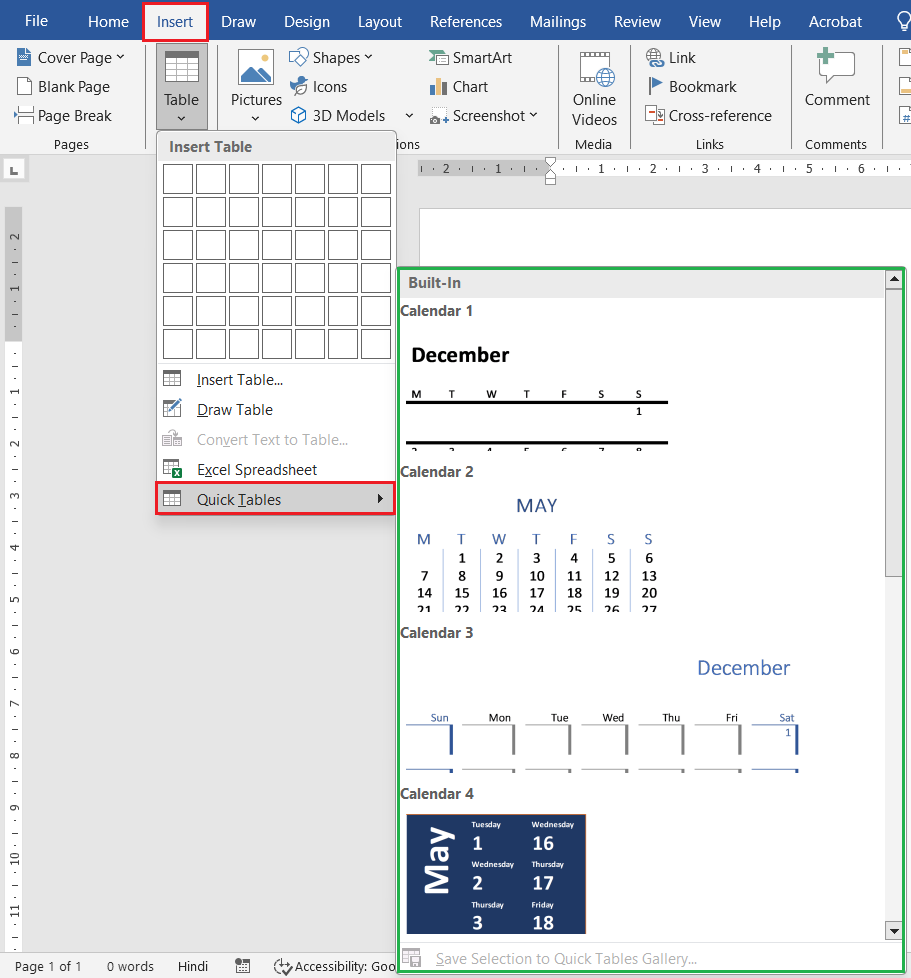
Table Select करने की विधियाँ
| कार्य | Shortcut / विधि |
| Cell Select | Cursor रखकर Triple Click |
| Row Select | Left Margin पर Pointer रखकर Click |
| Column Select | Top Border पर Pointer रखकर Click |
| Entire Table | Table Move Handle पर Click / Alt + 5 (NumPad) |
💡 Tip: Table Move Handle एक छोटा “Plus (+)” चिन्ह होता है, Table के ऊपर बाएँ कोने में।
Row और Column जोड़ना / हटाना
| कार्य | Shortcut / Menu |
| Insert Row Above | Right Click → Insert → Rows Above |
| Insert Row Below | Right Click → Insert → Rows Below |
| Insert Column Left | Right Click → Insert → Columns to the Left |
| Insert Column Right | Right Click → Insert → Columns to the Right |
| Delete Row / Column | Right Click → Delete Cells → Choose Option |

💡 Tip: Table Tools → Layout Tab में भी ये विकल्प मिलते हैं।
Merge & Split Cells (कक्ष मिलाना और विभाजित करना)
| कार्य | Menu / Shortcut |
| Merge Cells | Select → Right Click → Merge Cells |
| Split Cells | Select → Right Click → Split Cells |
| Split Table | Cursor रखें → Layout Tab → Split Table |
Example: Certificate या Marksheet के Heading Row में “Merge Cells” बहुत उपयोगी होता है

Table Formatting (तालिका स्वरूपण)
Formatting के लिए “Table Tools → Design Tab” प्रयोग करें। इसमें शामिल हैं —
- Table Styles
- Borders and Shading
- Header Row / Total Row
- Banded Rows (Alternate Colors)
- Border Painter Tool

💡 Tip: Light Gray या Blue Shades का प्रयोग Table को Professional Look देता है।
Cell Size बदलना
| कार्य | विधि |
| Row Height बदलना | Layout Tab → Cell Size Group → Height Box |
| Column Width बदलना | Layout Tab → Width Box |
| AutoFit | Layout → AutoFit → AutoFit Contents / Window |
Shortcut: Alt + JL + I (Layout Tab Access Key)

💡 Tip: “AutoFit Contents” से Cell अपने आप Text की लंबाई के अनुसार बढ़ता है।
Alignment of Text in Cell (पाठ का संरेखन)
| Alignment Type | Shortcut / विधि |
| Top Align | Layout Tab → Align Top |
| Center Align | Layout Tab → Align Center |
| Bottom Align | Layout Tab → Align Bottom |
| Text Direction | Layout Tab → Text Direction |

💡 Tip: Certificate या ID Card Design में “Vertical Text Direction” उपयोगी होता है।
Sorting Data in Table
Data को Ascending या Descending क्रम में लगाने के लिए Sorting का उपयोग होता है।
Steps:
- Table Select करें
- Layout Tab → Sort → Choose Column → Ascending / Descending
Example: Name Column को A–Z या Z–A क्रम में Arrange करना।

Common Formulas:
- =SUM(ABOVE) → ऊपर वाले नंबरों का योग
- =AVERAGE(LEFT) → बाएँ वाले नंबरों का औसत
- =MAX(ABOVE) → सबसे बड़ा मान
- =MIN(ABOVE) → सबसे छोटा मान
💡 Note: Word Formulas limited हैं, पर Basic Reports के लिए पर्याप्त हैं।
Formula in Table
Word में Table के अंदर Basic Calculations की सुविधा होती है।
Steps:
- Cursor को उस Cell में रखें जहाँ Result चाहिए
- Layout Tab → Formula
- Formula Box में लिखें — =SUM(ABOVE) या =AVERAGE(LEFT)
- OK करें

Convert Table to Text
यदि आप Table को Normal Text में बदलना चाहें —
Steps: Select Table → Layout Tab → Convert to Text → Separate by Tabs / Commas

Common Mistakes and Fixes
| समस्या | समाधान |
| Table Cut हो रहा है | Page Margins कम करें या AutoFit Window करें |
| Text Center नहीं है | Layout → Align Center करें |
| Column Fixed नहीं रह रहा | AutoFit → Fixed Column Width करें |
| Border Print नहीं हो रहा | File → Options → Display → “Print Drawings” Enable करें |
Quick Summary (Unit 5 Revision Table)
| कार्य | Shortcut / Menu |
| Insert Table | Alt + N + T |
| Insert Row Below | Alt + JL + B |
| Merge Cells | Alt + JL + M |
| Split Cells | Alt + JL + P |
| Sort Table | Alt + JL + SO |
| Formula | Alt + JL + FO |
| AutoFit | Alt + JL + A |
| Select Table | Alt + JT + A |
Practical Task – Unit 5✍️Task (कार्य):
|
Unit 6: Graphics & Objects
यह यूनिट Microsoft Word में आपके Documents को visual और professional look देने के लिए सबसे ज़रूरी है।
ADCA Practical Exams में इस यूनिट से Shapes बनाना, Picture Insert करना, SmartArt और Chart Use करना जैसे tasks अक्सर पूछे जाते हैं।
Graphics & Objects क्या हैं?
- Graphics वे दृश्य (Visual) तत्व हैं जिन्हें Document में शामिल करके उसे आकर्षक, समझने योग्य और Professional बनाया जाता है।
- Objects वे सभी Inserted Items होते हैं जो Text का हिस्सा नहीं होते — जैसे Pictures, Shapes, Charts, Icons, आदि।
उदाहरण: Images, ClipArt, Shapes, WordArt, Charts, SmartArt, Text Box आदि।
Picture Insert करना
Picture का उपयोग Document में Photos या Illustrations जोड़ने के लिए किया जाता है।
Steps:
- Insert Tab → Pictures
- चुनें:
- This Device (अपने कंप्यूटर से)
- Stock Images (Ready-made pictures)
- Online Pictures (Internet से खोजें)
- Insert पर क्लिक करें
Shortcut: Alt + N + P

💡 Tip: High-quality JPEG या PNG Images का प्रयोग करें ताकि Printing स्पष्ट रहे।
Picture Tools (Format Tab)
Picture Insert करने के बाद Word “Picture Format Tab” दिखाता है।
| विकल्प | कार्य |
| Corrections | Brightness, Contrast बदलना |
| Color | Image का रंग बदलना |
| Artistic Effects | Sketch, Glow, Blur आदि इफेक्ट लगाना |
| Picture Styles | Ready-made फ्रेम या Border लगाना |
| Crop | Image को काटना (Crop करना) |
| Remove Background | Background हटाना |
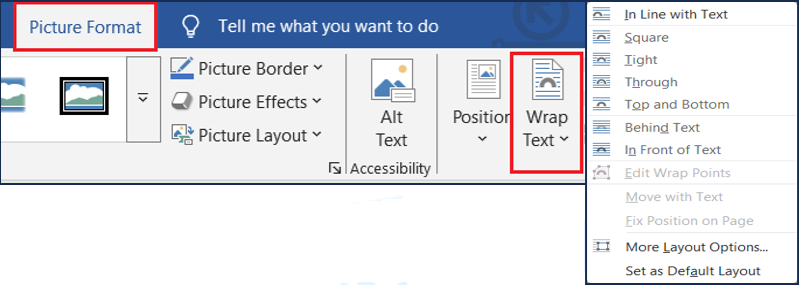
| Wrap Text | Text के साथ Image का Position तय करना |

💡 Tip: “Wrap Text → Tight” से Text और Picture एक साथ सुंदर दिखते हैं।
Text Wrapping (पाठ लपेटना)
Text Wrapping का मतलब है — Picture के चारों ओर Text को कैसे रखा जाए।
| विकल्प | विवरण |
| In Line with Text | Picture Text के साथ एक लाइन में |
| Square | Text चारों ओर बॉक्स की तरह |
| Tight | Text Image की बॉर्डर के करीब |
| Behind Text | Text के पीछे Picture |
| In Front of Text | Text के ऊपर Picture |
| Top and Bottom | Text ऊपर-नीचे और बीच में Picture |
Shortcut: Alt + JP + TW
💡 Exam Tip: “Behind Text” और “In Front of Text” अक्सर practical में पूछे जाते हैं।
Shapes (आकृतियाँ)
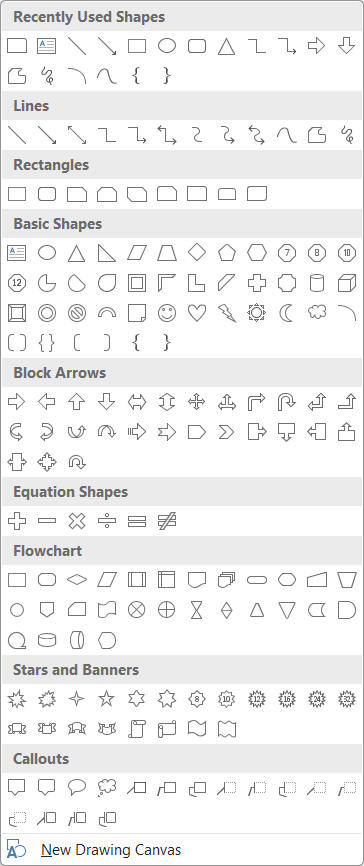
Shapes का उपयोग Diagram, Design या Illustration के लिए किया जाता है।
Steps:
- Insert Tab → Shapes
- Line, Rectangle, Arrow, Star, Flowchart Symbol आदि चुनें
- Mouse से Drag करके बनाएँ
Shortcut: Alt + N + SH
💡 Exam Tip: “Shift Key” दबाकर Shape बनाएं ताकि उसकी symmetry (Square / Circle) बनी रहे।
Shape Formatting (आकृति स्वरूपण)
Shape पर क्लिक करते ही “Shape Format Tab” खुलता है। इसमें आप बदल सकते हैं —
| विकल्प | कार्य |
| Shape Fill | Shape का रंग भरना |
| Shape Outline | Border का रंग व मोटाई |
| Shape Effects | Shadow, Reflection, Glow |
| Text in Shape | Shape के अंदर Text लिखना |
| Align / Rotate / Group | Objects का स्थान व दिशा बदलना |

Shortcut: Alt + JD + SF (Shape Fill), Alt + JD + SO (Outline)
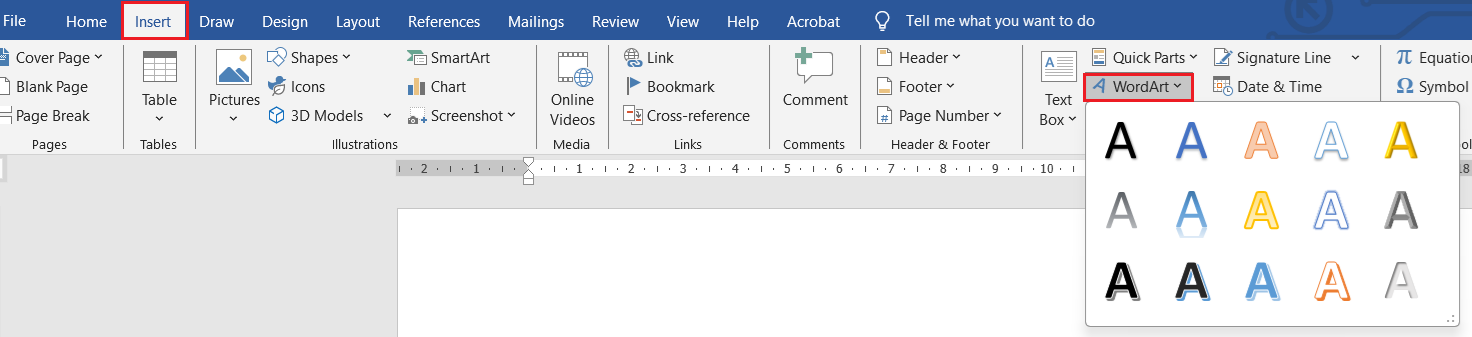
WordArt (Text Decoration)
WordArt का उपयोग Decorative Heading या Title बनाने के लिए किया जाता है।
Steps: Insert Tab → WordArt → कोई Style चुनें → Text लिखें
Shortcut: Alt + N + W
💡Tip: WordArt को Normal Text की तरह Move, Rotate, Resize किया जा सकता है।
💡Practical Example: Certificate Design में “CERTIFICATE OF ACHIEVEMENT” WordArt से बनाया जा सकता है।
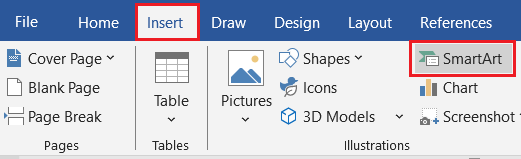
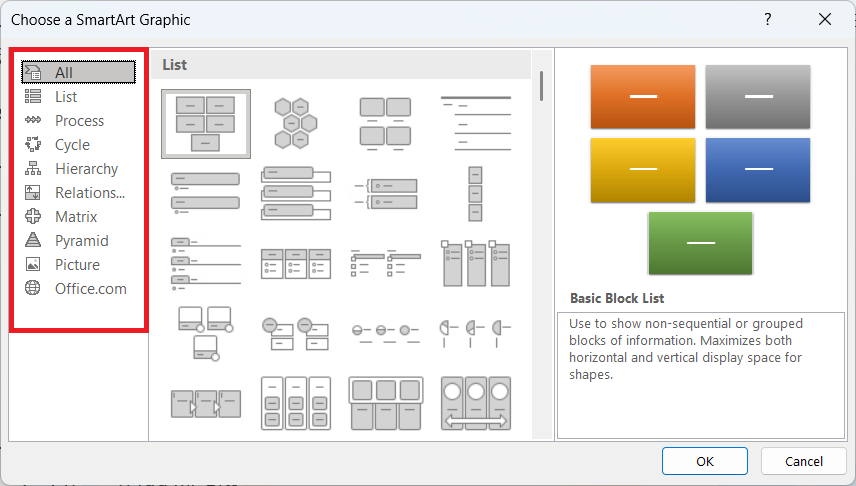
SmartArt (स्मार्ट ग्राफ़िक)
SmartArt का प्रयोग Organizational Charts, Process Diagrams, Cycle या Hierarchy Structure दिखाने के लिए किया जाता है।
Steps:
1. Insert Tab → SmartArt
2. कोई Category चुनें:
- List
- Process
- Cycle
- Hierarchy
- Relationship
3. OK पर क्लिक करें
4. Text Pane में विवरण डालें
Shortcut: Alt + N + M
💡Tip: Process Diagram Project Flow या Step-by-Step Notes में उपयोगी है।
Chart (आलेख)
Chart का उपयोग डेटा को ग्राफ़िक रूप में प्रस्तुत करने के लिए किया जाता है — जैसे Column, Pie, Line, Bar आदि।
Steps:
- Insert Tab → Chart
- Chart Type चुनें (Column, Pie, Line, etc.)
- OK करें → Excel Sheet खुलेगा
- Data बदलें → Chart Update हो जाएगा
Shortcut: Alt + N + C
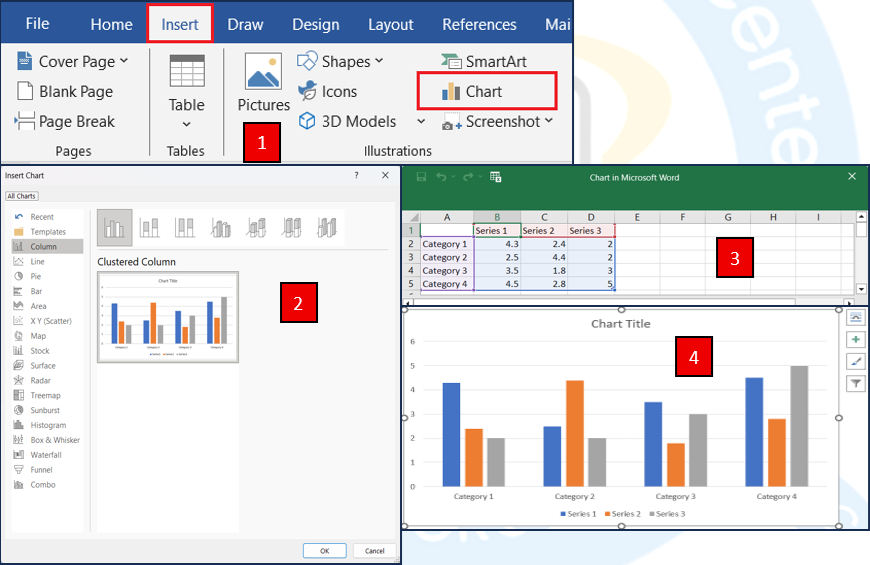
💡Tip: Chart को Table के साथ जोड़ने पर Project Report Professional दिखती है।
Screenshot & Screen Clipping
Word में आप किसी Window या Screen के हिस्से का Screenshot भी डाल सकते हैं।
Steps: Insert Tab → Screenshot →
- Available Windows → पूरी Window Insert
- Screen Clipping → किसी हिस्से को चुनें
Shortcut: Alt + N + SC
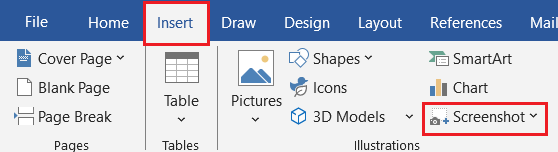
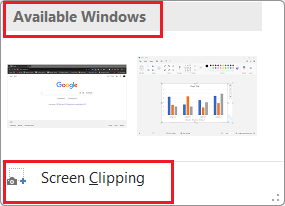
💡Tip: Tutorial या Project Reports में बहुत उपयोगी।
Grouping, Aligning, and Rotating Objects
| कार्य | Menu / Shortcut |
| Group | Ctrl + Click करके कई Objects चुनें → Right Click → Group |
| Ungroup | Right Click → Group → Ungroup |
| Align | Format Tab → Align → Top / Center / Middle |
| Rotate | Format Tab → Rotate → Flip / 90° Turn |

💡Tip: Grouping से कई Objects एक साथ Move या Resize किए जा सकते हैं।
Layering Order (Send to Back / Bring to Front)
Word में जब कई Pictures या Shapes एक-दूसरे पर हों, तो उनकी Position बदलने के लिए। जैसे:

| कार्य | Menu |
| Bring to Front | Object को सबसे ऊपर लाता है |
| Send to Back | Object को सबसे नीचे भेजता है |
| Bring Forward / Send Backward | एक-एक स्तर बदलता है |
Menu: Right Click → Wrap Text → Order
Object Formatting Summary
| कार्य | Shortcut / Menu |
| Insert Picture | Alt + N + P |
| Insert Shape | Alt + N + SH |
| Insert SmartArt | Alt + N + M |
| Insert Chart | Alt + N + C |
| Insert WordArt | Alt + N + W |
| Wrap Text | Alt + JP + TW |
| Group / Ungroup | Ctrl + G / Ctrl + Shift + G |
| Rotate | Alt + JP + RO |
Common Mistakes and Fixes
| समस्या | समाधान |
| Picture Move नहीं हो रही | “Wrap Text → Square / Tight” करें |
| WordArt Text Cut हो रहा | WordArt Box Size बढ़ाएँ |
| Chart Visible नहीं | Theme Color Change करें |
| Shape Selection कठिन | “Selection Pane” On करें (Alt + JP + SP) |
Practical Task – Unit 6✍️Task (कार्य):
|
Unit 7: Graphics & Objects
यह यूनिट आपको सिखाएगा कि कैसे किसी Document को “Plain Report” से “Attractive, Professional & Publish-Ready” में बदला जाता है।
यह भाग ADCA Practical में अक्सर Project Report Design, Certificate Design, या Title Page Creation के रूप में पूछा जाता है।
Page Design क्या है?
Page Design का अर्थ है — किसी Document को Color, Font, Layout, और Style के माध्यम से एक Professional Appearance देना।
यह Document को आकर्षक बनाता है और उसकी प्रस्तुति को सुधारता है।
उदाहरण: Certificate, Report, Letterhead, Resume, Project File आदि में Page Design महत्वपूर्ण भूमिका निभाता है।
Design Tab का परिचय
MS Word में Design Tab (Page Design Tab) वह जगह है जहाँ से आप पूरे Document की Theme, Colors, Fonts और Effects को नियंत्रित कर सकते हैं।
मुख्य समूह (Groups):
- Document Formatting
- Page Background

Themes (थीम्स)
Themes Document के लिए एक Predefined Color, Font और Effect Combination होती है।
यह पूरे Document की Styling को एक साथ बदल देती है।
Access: Design Tab → Themes → चुनें कोई Theme
| कार्य | विवरण |
| Change Theme | Theme बदलने से पूरे Document की Look बदलती है |
| Customize Theme | अपनी पसंद के Fonts, Colors जोड़ें |
| Save Current Theme | Custom Theme को Future के लिए Save करें |
Shortcut: Alt + G + TH
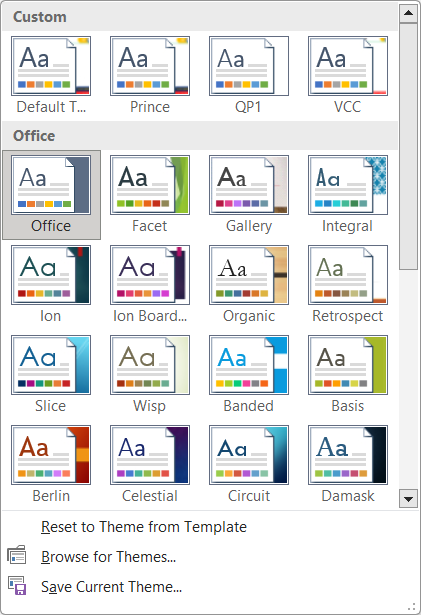
💡Tip: Professional Documents में “Office” या “Ion” Themes सुंदर और औपचारिक लगती हैं।
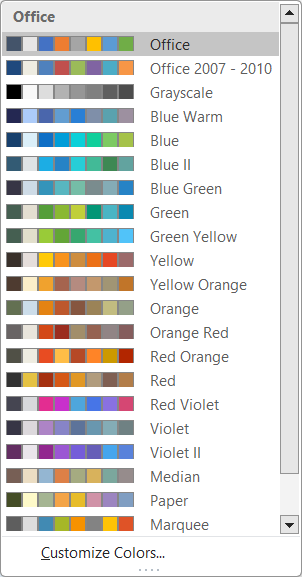
Theme Colors (थीम के रंग)
Theme Colors पूरे Document में Text, Shape, Chart और Hyperlink के लिए Color Scheme तय करते हैं।
Access: Design Tab → Colors → Theme Colors चुनें
Custom Colors:
- Accent 1–6: विभिन्न Object Colors
- Text/Background 1–2: Font और Page Colors
Shortcut: Alt + G + C

💡Practical Tip: एक ही Document में बहुत अधिक रंगों का प्रयोग न करें, यह Unprofessional लगता है।
Theme Fonts (थीम के फ़ॉन्ट्स)
Word में हर Theme दो Font Styles तय करती है:
- Heading Font
- Body Font
Access: Design Tab → Fonts → Theme Fonts
Example:
- Heading Font → Calibri Light
- Body Font → Calibri


💡Tip: Hindi Document के लिए Mangal या Nirmala UI Font का प्रयोग करें।
Theme Effects (प्रभाव)
Theme Effects से Shapes, Charts और SmartArt में Shadow, Glow, Bevel जैसे Visual Effects जोड़े जा सकते हैं।
Access: Design Tab → Effects

💡Tip: Effects Theme बदलने से केवल Object के Visual Effects बदलते हैं, Text पर नहीं।
Page Borders (पृष्ठ सीमा)
Page Borders Document के चारों ओर एक Decorative या Simple Line जोड़ती है।
यह Page को सुंदर और Organized बनाता है।
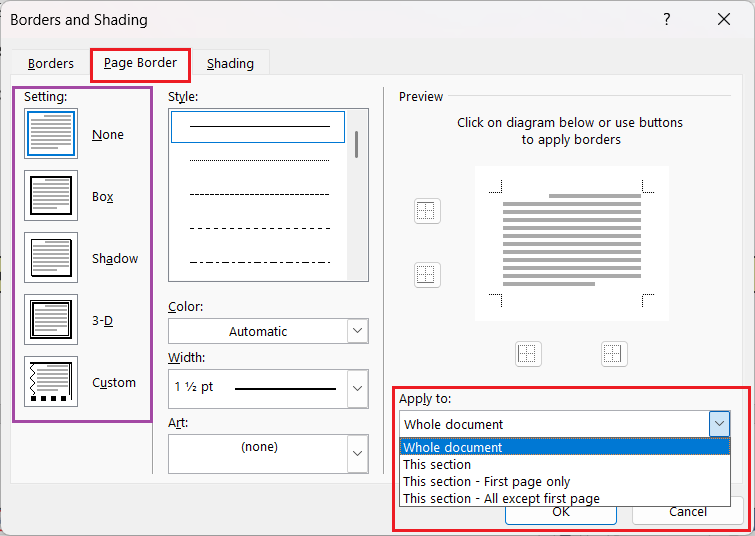
Access: Design Tab → Page Borders
Steps:
- Design Tab → Page Borders
- Setting: Box / Shadow / 3D / Custom
- Apply To: Whole Document / First Page Only
Shortcut: Alt + G + PB

💡Tip: Certificates या Cover Pages में Double Line Border सुंदर लगता है।
Page Color (पृष्ठ का रंग)
Page Color Document के Background में रंग भरने के लिए प्रयोग होता है।
Access: Design Tab → Page Color → कोई रंग चुनें
Shortcut: Alt + G + PC

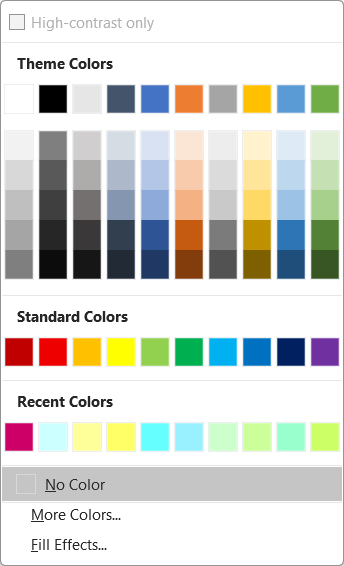
💡Tip: Light Color (जैसे Light Grey या Cream) बेहतर लगता है; Dark Colors पर Text पढ़ना कठिन होता है।
Watermark (वॉटरमार्क)
Watermark एक हल्का Text या Image होता है जो हर Page के Background में दिखाई देता है।
यह आमतौर पर Confidential या Draft Documents में प्रयोग किया जाता है।
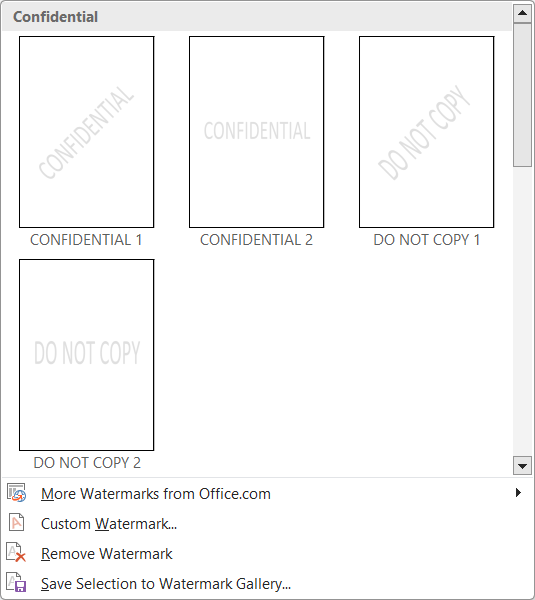
Access: Design Tab → Watermark
Steps:
- Design Tab → Watermark
- चुनें Predefined Text (Confidential, Draft आदि)
- या → Custom Watermark → Text / Picture Watermark
Shortcut: Alt + G + W

Example:
- Text Watermark: “CONFIDENTIAL”
- Picture Watermark: कंपनी का Logo
💡Tip: Watermark की Opacity कम रखें ताकि Text पढ़ने में दिक्कत न हो।
Page Background Group Summary
| विकल्प | कार्य |
| Page Color | Page का रंग बदलता है |
| Page Borders | Page के चारों ओर बॉर्डर बनाता है |
| Watermark | पृष्ठ पर हल्का टेक्स्ट या चित्र लगाता है |
Shortcut Key: Alt + G (Design Tab)
Header & Footer Design Integration
Page Design का असर Header & Footer पर भी पड़ता है। आप Theme के अनुरूप Header/Footer Styles चुन सकते हैं।
Steps: Insert Tab → Header/Footer → Built-in Design चुनें


💡Tip: Design Tab में मौजूद Theme Colors इन पर भी लागू होती हैं।
Applying Design to Specific Sections
यदि Document में Section Breaks हैं, तो आप Different Themes / Borders / Colors अलग-अलग Sections पर लगा सकते हैं।
Steps:
- Section Break लगाएँ (Layout → Breaks → Next Page)
- उस Section पर Cursor रखें
- Design Tab → इच्छित Theme / Border चुनें
Example:
- Cover Page = Dark Theme
- Body Pages = Light Theme
Resetting to Default Design
यदि Theme या Design गड़बड़ हो जाए तो ये काम करें –
👉 Design Tab → Themes → Reset to Default Theme
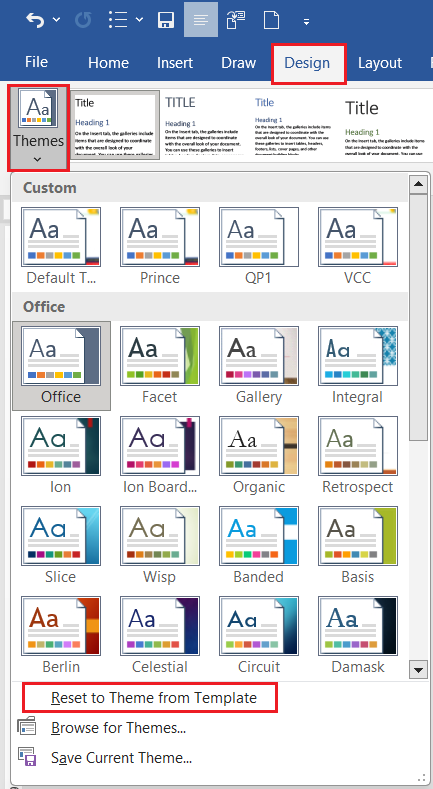
💡Tip: Default Theme “Office” कहलाती है।
Quick Summary (Unit 7 Revision Table)
| कार्य | Shortcut / Menu |
| Change Theme | Alt + G + TH |
| Theme Colors | Alt + G + C |
| Theme Fonts | Alt + G + F |
| Page Color | Alt + G + PC |
| Page Borders | Alt + G + PB |
| Watermark | Alt + G + W |
| Reset Theme | Alt + G + R |
Practical Task – Unit 7✍️Task (कार्य):
|
Unit 8: Mail Merge & Labels
यह यूनिट ADCA और CCC दोनों में 100% पूछी जाती है (theory और practical दोनों में) ।
इससे आप सीखेंगे कि कैसे एक ही Document को कई लोगों के नाम और विवरण के साथ अपने-आप तैयार किया जा सकता है — जैसे letters, certificates, marksheets, address labels आदि।
Mail Merge क्या है?
Mail Merge एक ऐसी प्रक्रिया है जिसके माध्यम से आप एक ही Document को अलग-अलग व्यक्तियों के नाम या डेटा के साथ स्वचालित रूप से तैयार कर सकते हैं।
सरल शब्दों में: Mail Merge = Main Document + Data Source = Multiple Personalized Documents
उदाहरण:
- पत्र (Letters) → अलग-अलग लोगों के नाम के साथ
- प्रमाणपत्र (Certificates) → अलग-अलग नाम और रोल नंबर के साथ
- लिफाफे / Labels → अलग-अलग पते के साथ
Mail Merge के मुख्य घटक (Main Components)
| घटक | विवरण |
| 1. Main Document | वह Document जिसमें Merge Fields डाले जाते हैं (जैसे Letter या Certificate Template) |
| 2. Data Source | वह File जिसमें विभिन्न नाम, पता, आदि डेटा होता है (जैसे Excel Sheet या Table) |
| 3. Merge Fields | वे स्थान जहाँ Data Source का डेटा अपने-आप भरेगा |
| 4. Merged Document | अंतिम परिणाम जिसमें सभी रिकॉर्ड्स जुड़कर Personalized Documents बनते हैं |
Mail Merge के उपयोग
- Personal Letters (Invitation, Notification, Appointment)
- Certificates
- Marksheets
- Fee Receipts
- Address Labels
- Envelopes
💡Practical Tip: Mail Merge हर Practical Exam में “Letter for 10 students” या “Certificate for 5 names” जैसे Task के रूप में पूछा जाता है।
Mail Merge प्रक्रिया (Steps to Perform Mail Merge)
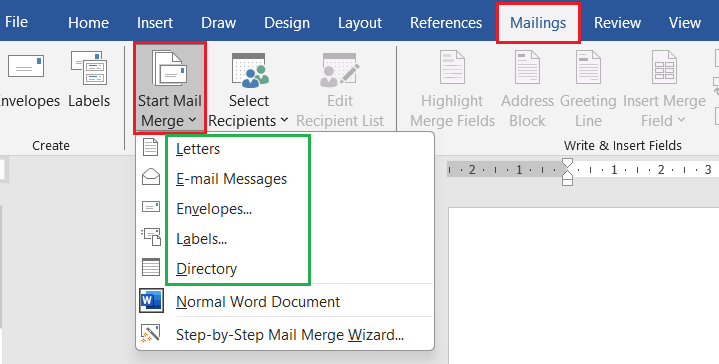
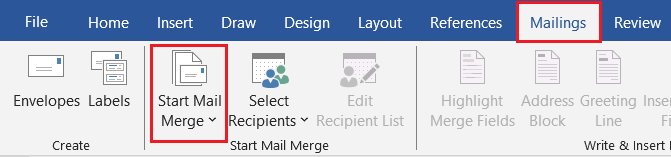
Step 1: Start Mail Merge
- Open Word Document
- Mailings Tab → Start Mail Merge → Select Type (Letters / Envelopes / Labels / Directory)
Shortcut: Alt + M + S
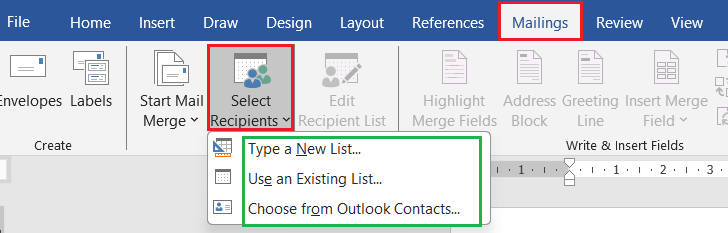
Step 2: Select Recipients (Data Source): अब आपको Data Source चुनना होता है —
Options:
- Type a New List → नया डेटा मैन्युअली बनाएं
- Use an Existing List → पहले से बनी Excel या Access File चुनें
- Choose from Outlook Contacts
Shortcut: Alt + M + S + R
💡Tip: Excel File में Data Table Format में होना चाहिए (पहली Row में Column Names)
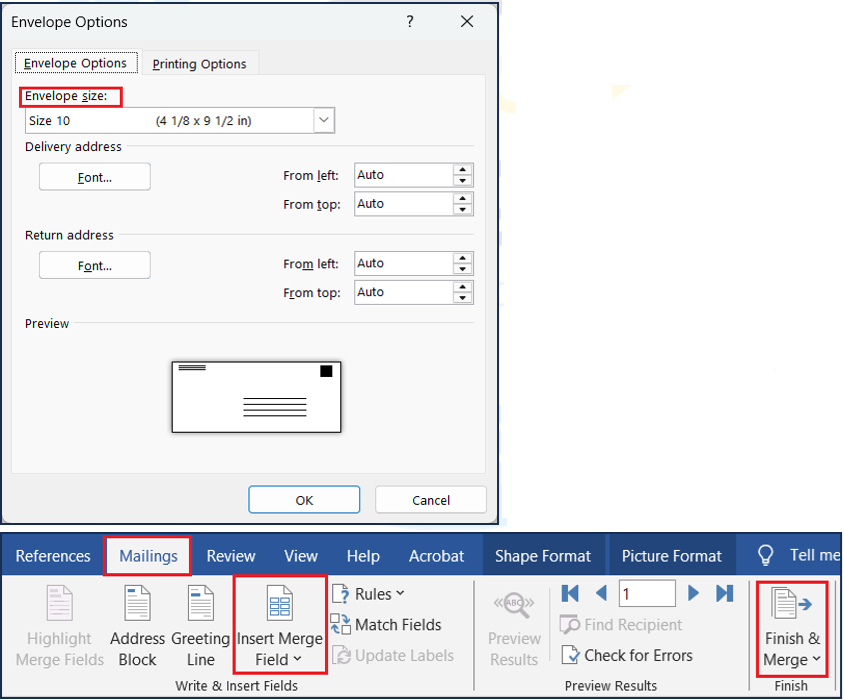
Step 3: Insert Merge Fields: अब अपने Document में जहाँ Data चाहिए, वहाँ Merge Fields डालें।
Steps: Mailings Tab → Insert Merge Field → Name / Address / RollNo आदि
Example:
प्रिय <<Name>>,
आपका रोल नंबर <<Roll_No>> है।
Shortcut: Alt + M + I

💡Tip: Merge Fields को Bold या Color में Formatting भी दे सकते हैं।
Step 4: Preview Results: Merge Fields में वास्तविक Data कैसा दिखेगा, यह देखने के लिए:
Mailings → Preview Results
Shortcut: Alt + M + P

💡Tip: आप Record Navigation Arrows से एक-एक Record देख सकते हैं।
Step 5: Finish & Merge: अब सभी Personalized Documents तैयार करने के लिए:
Access: Mailings Tab → Finish & Merge →
- Edit Individual Documents → सभी Documents नए Word File में खुलेंगे
- Print Documents → सीधे प्रिंट करें
- Send E-Mail Messages → ईमेल द्वारा भेजें
Shortcut: Alt + M + F

Example (Letter Mail Merge Practical)
Main Document (Letter Template):
प्रिय <<Name>>,
आपका Roll Number <<RollNo>> है और आपने <<Course>> परीक्षा में <<Marks>> अंक प्राप्त किए हैं।
हम आपको आपकी सफलता पर बधाई देते हैं।
धन्यवाद!
Data Source (Excel File):
| Name | RollNo | Course | Marks |
| रमा | 101 | ADCA | 88 |
| अमित | 102 | ADCA | 92 |
| पूजा | 103 | ADCA | 85 |
Result after Merge:
प्रिय रमा,
आपका Roll Number 101 है और आपने ADCA परीक्षा में 88 अंक प्राप्त किए हैं।
हम आपको आपकी सफलता पर बधाई देते हैं।
Mail Merge Data Source बनाने के तरीके
Option 1: Word Table
Insert → Table → Columns (Name, RollNo, Course) → Save As Data Source
Option 2: Excel File
Excel में Columns बनाएँ → Save As → .xlsx
Example:
Name | RollNo | Course
Amit | 101 | ADCA
Option 3: New List
Mailings → Select Recipients → Type New List → Enter Data → Save
💡Tip: Excel Sheet सबसे आसान और सबसे अधिक प्रयोग में आने वाला विकल्प है।
Creating Labels (लेबल बनाना)
Labels का प्रयोग पते (Addresses) या नाम-पट्टिकाएँ (Name Badges) बनाने के लिए किया जाता है।
Steps:
- Mailings Tab → Start Mail Merge → Labels
- Label Vendor चुनें (जैसे Avery A4)
- Label Size चुनें
- OK करें → Table-जैसा Layout बन जाएगा
- Insert Merge Field → Address / Name डालें
- Preview → Finish & Merge
Shortcut: Alt + M + S + L

💡Tip: Update Labels” क्लिक करना न भूलें ताकि सभी Labels में Fields लग जाएँ।
Creating Envelopes (लिफाफा बनाना)
Steps:
1. Mailings → Start Mail Merge → Envelopes
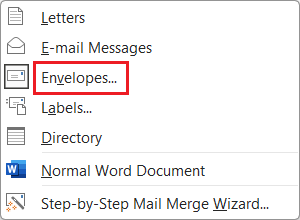
2. Envelope Size चुनें
3. Insert Merge Field → Address डालें
4. Finish & Merge करें
💡Tip: “Return Address” के लिए Header Area का उपयोग करें।
Mail Merge के फायदे (Advantages)
- समय और श्रम की बचत
- समान Document बार-बार टाइप करने की आवश्यकता नहीं
- त्रुटि-रहित Mass Document तैयार करना
- Certificates, Letters, Envelopes आदि में आसान प्रयोग
- Professional और Consistent Look
Common Problems & Fixes
| समस्या | समाधान |
| Excel File दिखाई नहीं दे रही | Excel File Close करें फिर Select करें |
| Fields गलत Merge हो रहे हैं | Merge Field Mapping दोबारा करें |
| Hindi Text गड़बड़ दिख रहा | Font “Mangal” सेट करें |
| Page Break आ रहा | Document Layout में Adjust करें |
Quick Summary (Revision Table)
| कार्य | Shortcut / Menu |
| Start Mail Merge | Alt + M + S |
| Select Recipients | Alt + M + S + R |
| Insert Merge Field | Alt + M + I |
| Preview Results | Alt + M + P |
| Finish & Merge | Alt + M + F |
| Labels | Alt + M + S + L |
| Envelopes | Alt + M + S + E |
Practical Task – Unit 8✍️Task (कार्य):
|
Unit 9: Proofing Tools
यह यूनिट Document की शुद्धता (Accuracy), Grammar, Spelling और Collaboration से जुड़ा हुआ है।
ADCA में यह यूनिट अक्सर “AutoCorrect, Spell Check, Comments, Track Changes” के Practical Tasks के रूप में पूछा जाता है।
Proofing Tools क्या हैं?
Proofing Tools का प्रयोग Document में टाइप किए गए Text की Spelling, Grammar, Word Usage और Language Mistakes को खोजने और सुधारने के लिए किया जाता है।
साथ ही, यह उपयोगकर्ता को Suggestions और Auto-Corrections प्रदान करते हैं।
सरल शब्दों में: Proofing Tools = वो उपकरण जो Document को त्रुटि-रहित (Error-free) बनाते हैं।
Proofing Tools की प्रमुख विशेषताएँ
| Tool | कार्य |
| Spelling & Grammar Check | वर्तनी और व्याकरण सुधारता है |
| AutoCorrect | सामान्य गलतियों को अपने-आप सुधारता है |
| Thesaurus | समानार्थी (Synonym) शब्द बताता है |
| Translate | Text को दूसरी भाषा में अनुवाद करता है |
| Comments | Feedback या सुझाव जोड़ने की सुविधा |
| Track Changes | Editing को Track करता है (Collaborative Editing) |
| Word Count | Document में शब्द, अक्षर और Paragraph गिनता है |

Spelling & Grammar Check (वर्तनी और व्याकरण जांच)
Word टाइपिंग के दौरान स्वतः ही गलतियों को रेखांकित करता है:
- लाल रेखा = Spelling Mistake
- नीली / हरी रेखा = Grammar Mistake
Steps to Check:
1. Review Tab → Spelling & Grammar
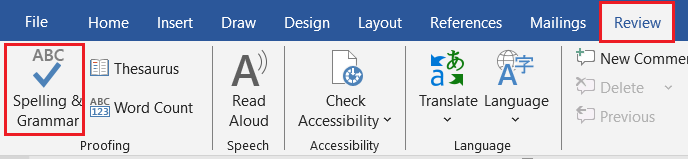
2. Word एक Dialog Box खोलेगा
3. “Change”, “Ignore”, या “Add to Dictionary” चुनें
Shortcut: F7
💡Tip: Document के अंत में F7 दबाना एक अच्छी आदत है (Final Spell Check)
AutoCorrect (स्वतः सुधार)
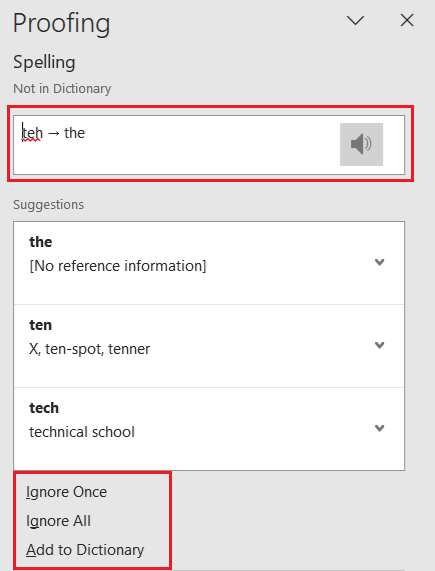
AutoCorrect टाइप करते समय आम spelling mistakes को अपने-आप सुधार देता है।
Example:
- teh → the
- adn → and
- recieve → receive
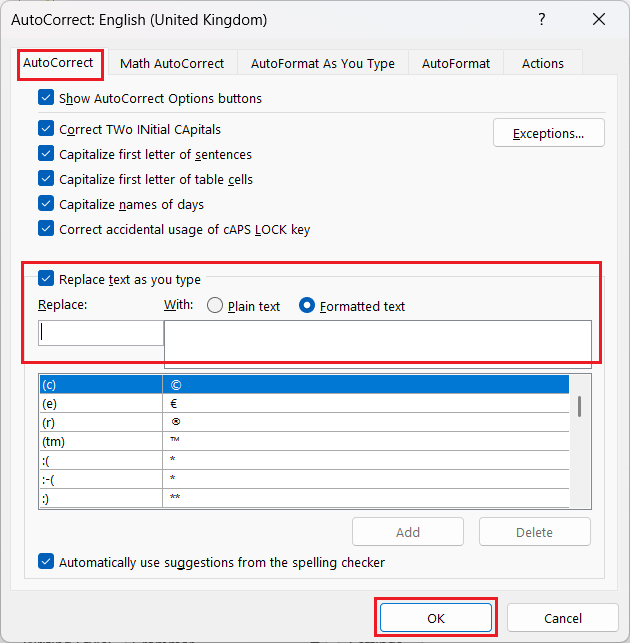
Access:
File → Options → Proofing → AutoCorrect Options
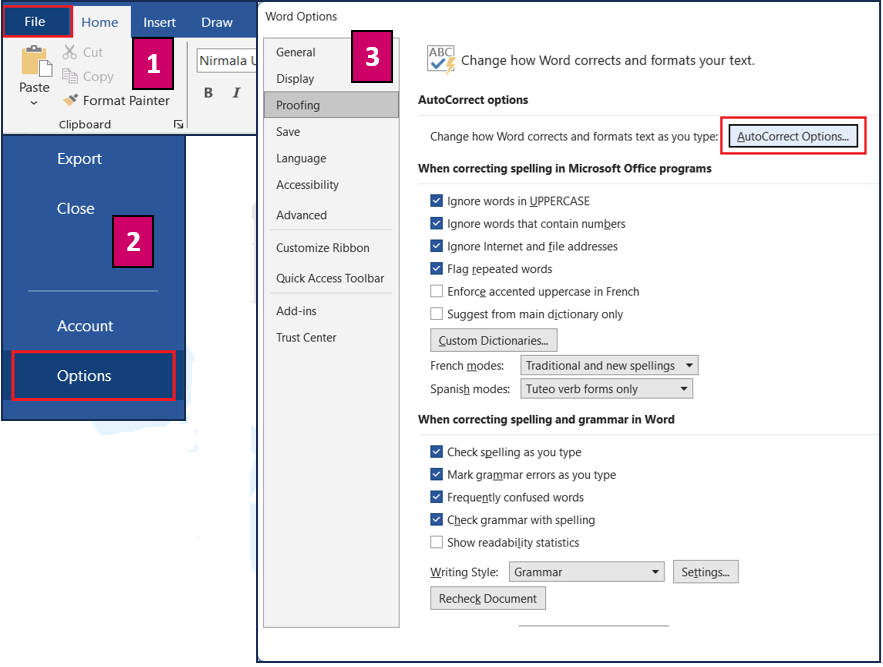
Steps:
- AutoCorrect Tab में जाएँ
- “Replace” और “With” में शब्द डालें
जैसे Replace: mfg → With: manufacturing - Add → OK
💡Tip: आप अपने Shortcut Words भी बना सकते हैं (जैसे “sig” → आपका Signature Text) ।
Thesaurus (समानार्थी शब्दकोश)
Thesaurus किसी शब्द के Synonyms (समानार्थी शब्द) या Antonyms (विपरीत अर्थ वाले शब्द) दिखाता है।
Steps:
1. उस शब्द को Select करें
2. Review Tab → Thesaurus
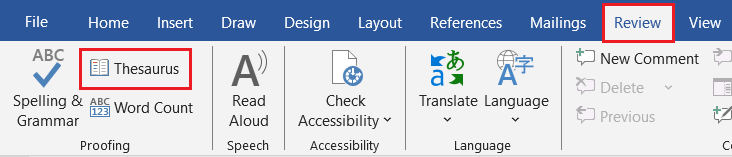
3. Pane में Suggested Words देखें
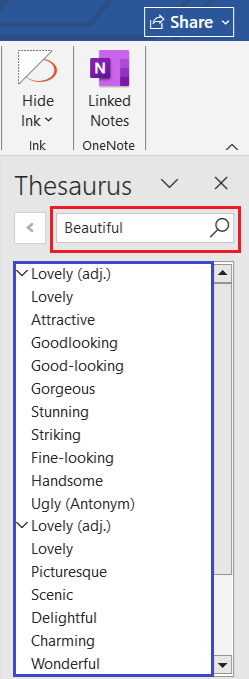
Shortcut: Shift + F7
Example: Word “Beautiful” → Synonyms: Pretty, Attractive, Lovely
💡Tip: Essay Writing या Report को Vocabulary-wise बेहतर बनाने के लिए Thesaurus का प्रयोग करें।
Translate (अनुवाद करना)
Word में एक Built-in Translator होता है जिससे आप किसी भाषा के शब्द या वाक्य को दूसरी भाषा में Translate कर सकते हैं।
Steps:
1. Text Select करें
2. Review Tab → Translate
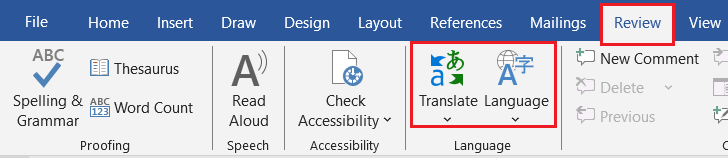
3. Target Language चुनें (जैसे English → Hindi)
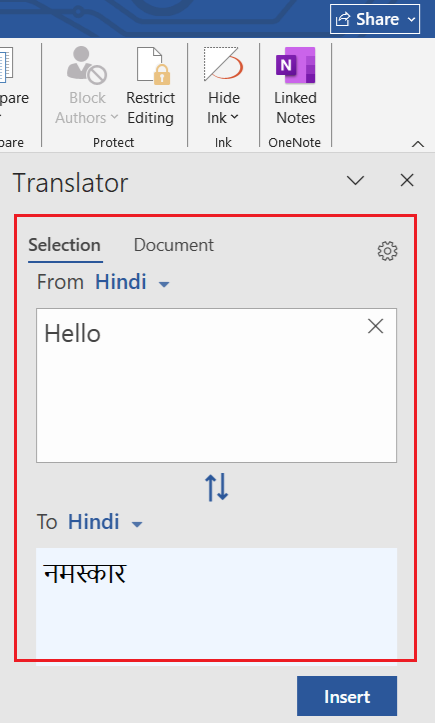
Example: “Hello” → “नमस्ते”
Note: यह Internet Connection पर निर्भर करता है।
Comments (टिप्पणियाँ जोड़ना)
Comments का उपयोग किसी Text पर Suggestion या Feedback देने के लिए किया जाता है।
Steps:
1. Text Select करें
2. Review Tab → New Comment
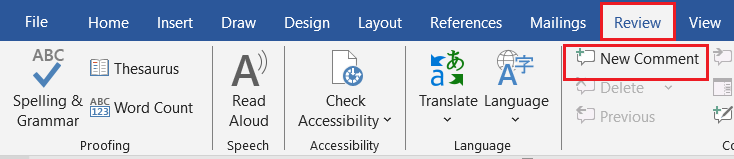
3. Comment Pane में Text लिखें
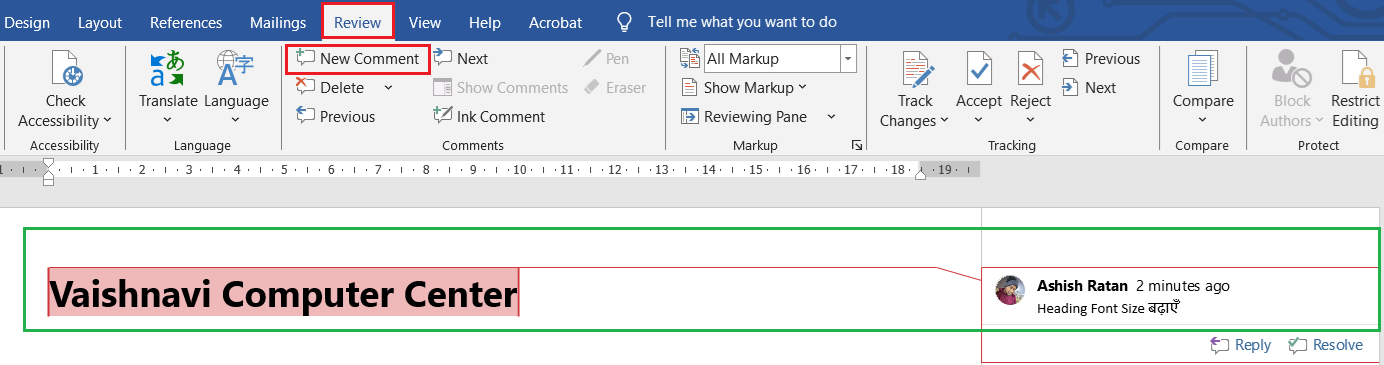
Shortcut: Ctrl + Alt + M
Example: “Heading font size बढ़ाएँ”
💡Tip: Comments केवल Review Mode में दिखते हैं, Print में नहीं।
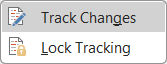
Track Changes (परिवर्तन ट्रैक करना)
Track Changes का उपयोग तब किया जाता है जब कई लोग एक ही Document को Edit करते हैं।
यह दिखाता है कि किसने क्या बदलाव किया और आप उसे Accept या Reject कर सकते हैं।
Steps:
1. Review Tab → Track Changes (On करें)

2. Editing करें → सभी बदलाव Red Mark में दिखेंगे

3. Accept या Reject से Finalize करें
Shortcut: Ctrl + Shift + E
💡Tip: Final Document से पहले “Review → Display for Review → Final” सेट करें ताकि साफ Text दिखे।
Reviewing Pane (समीक्षा पैन)
यह Pane Document में किए गए सभी बदलाव और Comments एक जगह दिखाता है।
Access: Review → Reviewing Pane → Vertical / Horizontal

💡Tip: Proofreading के दौरान सभी सुधारों की सूची एक ही जगह देखने के लिए उपयोगी।
Word Count (शब्द गिनना)
Word Count से आप Document में कुल शब्द, अक्षर, Paragraph, पंक्तियाँ और Pages की संख्या जान सकते हैं।
Access: Review Tab → Word Count
Shortcut: Ctrl + Shift + G
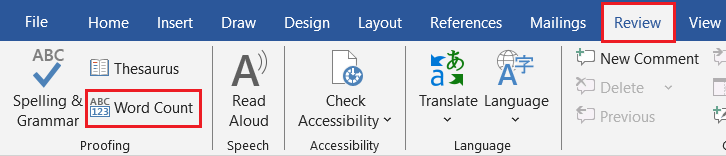
💡Tip: Word Count Status Bar में भी दिखाई देता है (नीचे बाएँ कोने में) ।
Common Proofing Tools Shortcuts
| कार्य | Shortcut |
| Spelling & Grammar Check | F7 |
| Thesaurus | Shift + F7 |
| Comments | Ctrl + Alt + M |
| Track Changes | Ctrl + Shift + E |
| Accept Change | Alt + Shift + A |
| Reject Change | Alt + Shift + R |
| Word Count | Ctrl + Shift + G |
Proofing Options Settings
Steps:
- File → Options → Proofing
- Choose:
- Check spelling as you type
- Mark grammar errors as you type
- Frequently confused words
- Customize AutoCorrect List
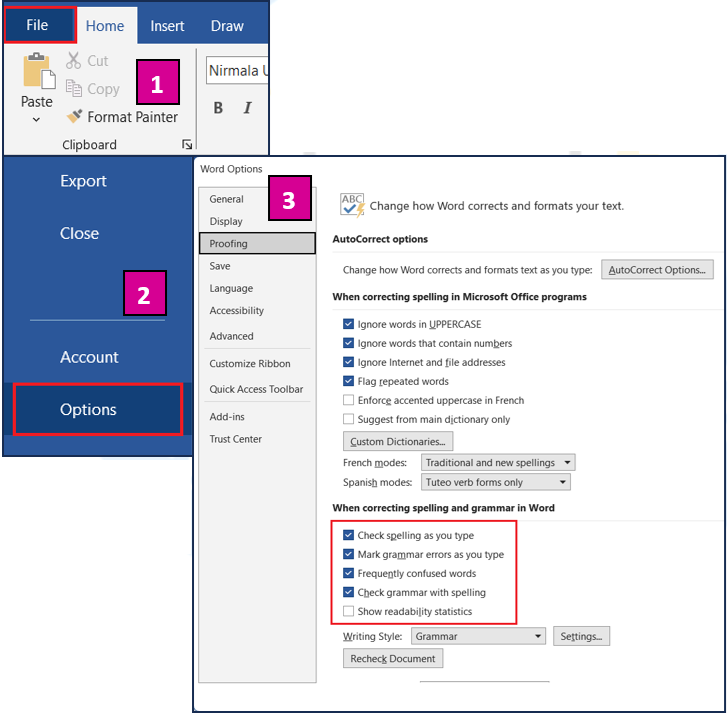
💡Tip: “Ignore words in UPPERCASE” विकल्प Technical Reports में उपयोगी है।
Quick Summary (Unit 9 Revision Table)
| Tool | Function | Shortcut |
| Spelling & Grammar | Errors Fix | F7 |
| AutoCorrect | Auto Fix Typos | File → Options → Proofing |
| Thesaurus | Find Synonyms | Shift + F7 |
| Translate | Convert Language | Review → Translate |
| Comment | Add Feedback | Ctrl + Alt + M |
| Track Changes | Show Modifications | Ctrl + Shift + E |
| Word Count | Count Words | Ctrl + Shift + G |
Practical Task – Unit 9✍️Task (कार्य):
|
Unit 10: References & Indexing
यह यूनिट ADCA में अक्सर Theory + Practical दोनों रूप में पूछी जाती है।
इससे आप सीखेंगे कि कैसे एक Professional Report, Project File या Thesis Document में Footnotes, Citations, Table of Contents (TOC), Captions और Index को व्यवस्थित किया जाता है।
References & Indexing क्या है?
References & Indexing का प्रयोग किसी Document में सूचना को व्यवस्थित करने, स्रोतों का उल्लेख करने और नेविगेशन आसान बनाने के लिए किया जाता है।
यह विशेष रूप से Research Report, Project File, Thesis, या Books में उपयोग होता है।
सरल शब्दों में:
- References = स्रोतों का उल्लेख
- Indexing = पृष्ठों पर विषयों की सूची बनाना
References Tab का परिचय
MS Word में References Tab का प्रयोग निम्न कार्यों के लिए किया जाता है 👇
| समूह | कार्य |
| Table of Contents | विषय-सूची बनाना |
| Footnotes | पृष्ठ के नीचे संदर्भ देना |
| Citations & Bibliography | स्रोतों की सूची बनाना |
| Captions | चित्र या तालिका को नाम देना |
| Index | शब्दों की सूची और उनके पृष्ठ नंबर |
| Table of Authorities | कानूनी/संदर्भ सूची बनाना |

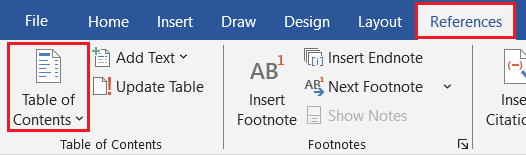
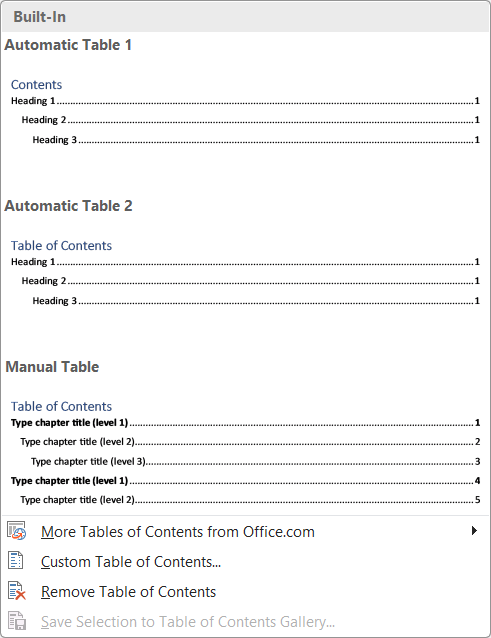
Table of Contents (विषय-सूची बनाना)
Table of Contents (TOC) Document की सभी Headings (Heading 1, Heading 2 आदि) को स्वतः एक सूची में बदल देता है, ताकि किसी विषय पर सीधे पहुँचा जा सके।
Steps:
- Document में Headings को Heading Styles दें (Home Tab → Styles → Heading 1 / 2)
- Cursor को TOC स्थान पर रखें
- References Tab → Table of Contents → Automatic Table चुनें
Shortcut: Alt + S + T
💡Tip: अगर Headings बाद में बदली जाएँ, तो TOC पर Right Click करें → “Update Field” चुनें।
Example:
Table of Contents
- Introduction ………………………………………. 1
- Formatting Text …………………………………… 5
- Page Setup …………………………………………. 10
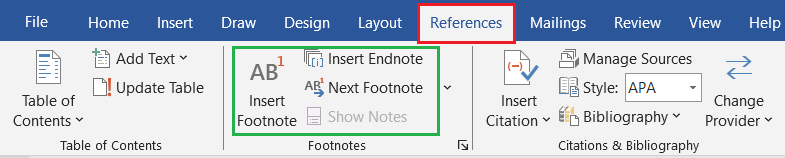
Footnotes & Endnotes (पादटिप्पणी और अंत टिप्पणी)
Footnote किसी Page के नीचे दी जाने वाली अतिरिक्त जानकारी होती है, जबकि Endnote पूरे Document के अंत में दी जाती है।
Steps:
1. Cursor उस शब्द पर रखें जहाँ संदर्भ चाहिए
2. References → Insert Footnote / Insert Endnote
3. Word स्वतः नंबर लगाएगा (जैसे ¹, ²) और नीचे Text Box खुलेगा
Shortcut:
- Footnote → Alt + Ctrl + F
- Endnote → Alt + Ctrl + D
Example:
“MS Word एक Word Processing Software है¹.”
¹ Microsoft द्वारा विकसित किया गया।
💡Tip: Footnotes को Format करने के लिए References → Footnotes → Dialog Box → Numbering/Location बदलें।
Citations & Bibliography (स्रोत और संदर्भ सूची)
Citation का प्रयोग तब किया जाता है जब आप किसी जानकारी या वाक्य को किसी बाहरी स्रोत (Book, Website, Report) से ले रहे हों।
Bibliography सभी Citations की एक सूची होती है।
Steps to Insert Citation:
1. References Tab → Insert Citation → Add New Source
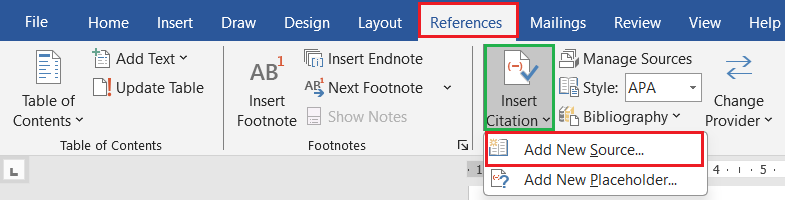
2. Source Type चुनें (Book / Website / Report / Journal etc.)
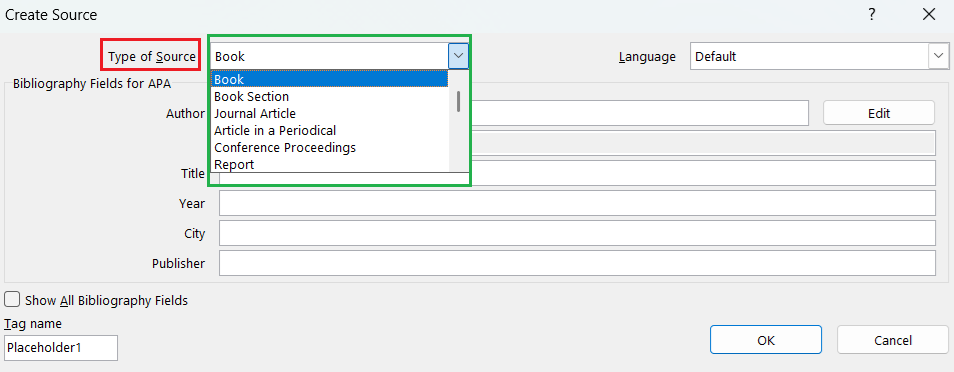
3. Author, Title, Year, Publisher भरें
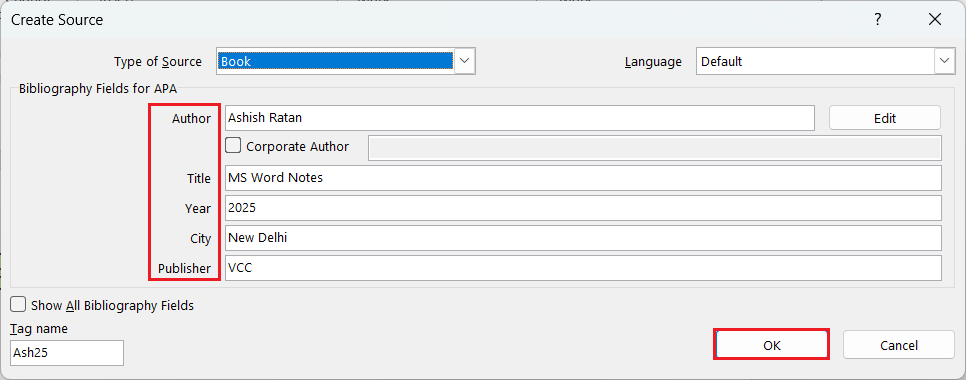
4. OK
Shortcut: Alt + S + C
Steps to Insert Bibliography:
References → Bibliography → Insert Bibliography
Shortcut: Alt + S + B

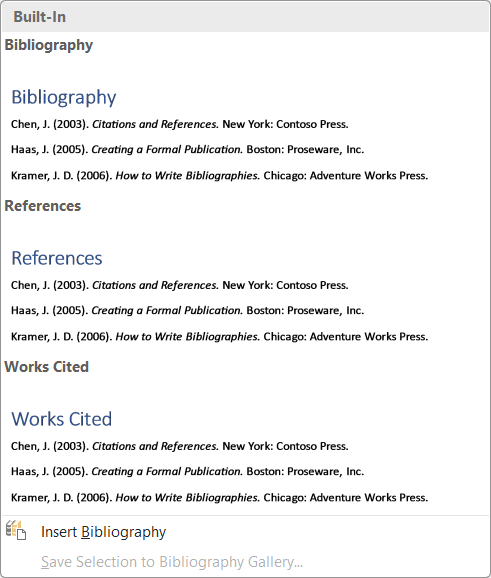
Example:
In text:
Microsoft Word is part of Office Suite (Sharma, 2021).
At end:
Sharma, R. (2021). MS Office Basics. New Delhi: TechPress.
Captions (चित्र या तालिका का नाम देना)
Captions का उपयोग Figures, Tables, या Charts को क्रमांक और नाम देने के लिए होता है।
इससे आप “Table 1”, “Figure 2” जैसी पहचान जोड़ सकते हैं।
Steps:
- Object (Picture/Table) Select करें
- References Tab → Insert Caption
- Label चुनें (Table / Figure / Equation)
- Caption Text डालें → OK
Example:
Figure 1: MS Word Interface
Table 2: Student Marks Data

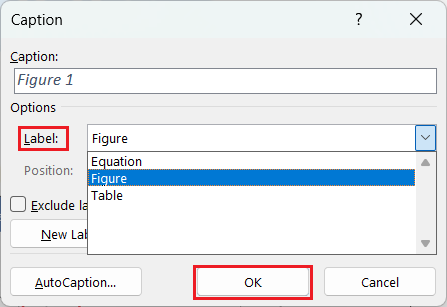
💡Tip: Caption Labels को Modify करने के लिए “New Label” Button प्रयोग करें।
Cross-Reference (परस्पर संदर्भ)
Cross-Reference का उपयोग Document में किसी Figure, Table या Heading को लिंक करने के लिए किया जाता है।
Steps:
1. References → Cross-reference

2. Reference Type चुनें (Heading / Figure / Table)
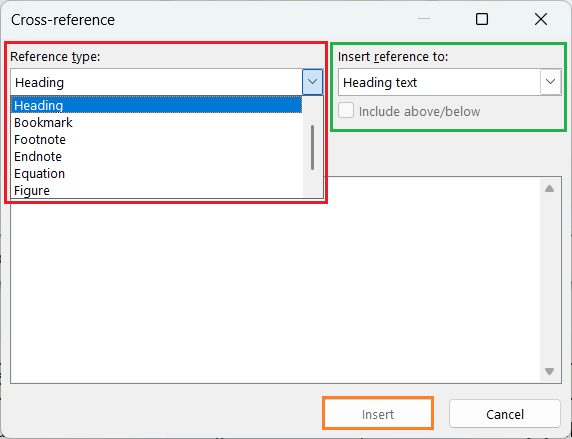
3. Insert Reference to → Text / Page Number
4. Insert करें
💡Tip: यह Reports और Project Files में Navigation के लिए बहुत उपयोगी होता है।
Index (सूचकांक बनाना)
Index किसी Document के अंत में शब्दों की सूची और उनके Page Numbers का संग्रह होता है। यह किसी किताब के “विषय सूची” जैसा होता है।
Steps:
1. उस शब्द को Select करें जिसे Index में जोड़ना है
2. References → Mark Entry → Mark All

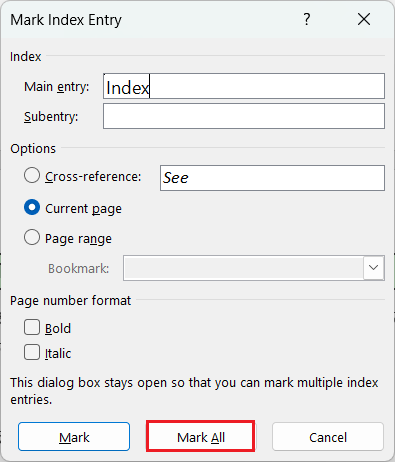
3. सभी शब्दों के लिए Repeat करें
4. जहाँ Index चाहिए, वहाँ Cursor रखें → Insert Index
Shortcut: Alt + Shift + X
Example:
Index
Formatting ………. 12
Mail Merge ………. 24
Page Setup ………. 10
💡Tip: Index तैयार होने के बाद “Update Index” दबाकर पृष्ठ संख्या अपडेट करें।
Table of Figures (चित्रों की सूची बनाना)
यह सुविधा Document में मौजूद सभी “Captions” की सूची तैयार करती है।
Steps:
1. References → Insert Table of Figures

2. Label चुनें (Figure / Table)
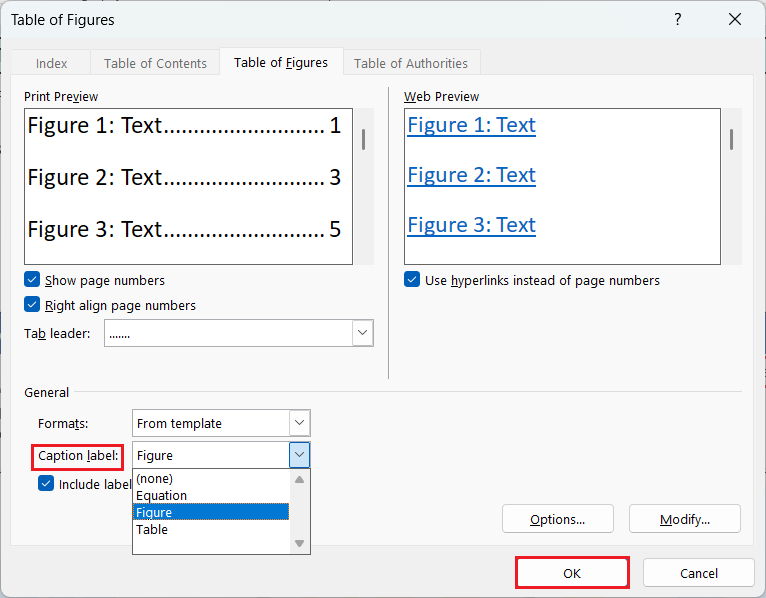
3. OK करें
💡Tip: यह सुविधा बड़े Reports में Figures को खोजने के लिए उपयोगी है।
Table of Authorities (कानूनी या संदर्भ सूची)
यह विशेष रूप से Law Documents या Official Reports में प्रयोग होता है। यह Citations या References के अनुसार Legal Reference List तैयार करता है।
Steps:
1. Text Select करें → References → Mark Citation

2. अंत में → Insert Table of Authorities

Updating References (अपडेट करना)
जब Document में कोई नई Heading, Figure या Citation जोड़ते हैं, तो References को Update करना आवश्यक होता है।
Steps:
- Right Click on TOC / Index / Bibliography → “Update Field”
- या Select करें → Press F9
Shortcut: F9
💡Tip: TOC Update करते समय “Update entire table” चुनें ताकि Page Numbers और Headings दोनों अपडेट हों।
Quick Summary (Unit 10 Revision Table)
| कार्य | Shortcut / Menu |
| Table of Contents | Alt + S + T |
| Insert Footnote | Alt + Ctrl + F |
| Insert Endnote | Alt + Ctrl + D |
| Insert Citation | Alt + S + C |
| Insert Bibliography | Alt + S + B |
| Insert Caption | Alt + S + P |
| Insert Index | Alt + Shift + X |
| Update Field | F9 |
Practical Task – Unit 10✍️Task (कार्य):
|
Unit 11: Advanced Features
यह यूनिट ADCA के लिए बेहद महत्वपूर्ण है क्योंकि यह बताता है कि Microsoft Word को एक professional document automation tool की तरह कैसे उपयोग किया जाता है।
इसमें शामिल हैं — Styles, Templates, Macros, Document Protection, Compare & Combine, Restrict Editing, आदि।
Advanced Features क्या हैं?
Advanced Features वे विशेष उपकरण (Features) हैं जिनकी मदद से आप Word Document को
Smart, Automated, Secure और Professional बना सकते हैं।
सरल शब्दों में: ये Features समय बचाते हैं, Formatting में समानता लाते हैं और Document को सुरक्षित बनाते हैं।
Styles (शैली या रूप)
Style का उपयोग किसी Text या Paragraph पर predefined formatting (Font, Size, Color, Spacing, Alignment आदि) एक साथ लागू करने के लिए किया जाता है।
Access: Home Tab → Styles Group
| Style Type | कार्य |
| Paragraph Style | पूरे Paragraph पर लागू |
| Character Style | केवल चयनित Text पर लागू |
| Linked Style | Text और Paragraph दोनों पर |
| Table / List Style | Table या Bullets पर लागू |
Shortcut: Alt + Ctrl + Shift + S → Styles Pane खोलता है।

Steps to Apply Style:
- Text Select करें
- Home Tab → Styles → Heading 1 / Normal / Quote / Title चुनें
💡Tip: Styles का प्रयोग करने से Table of Contents (TOC) अपने-आप बनती है।
Creating a New Style
Steps:
1. Home → Styles Pane → New Style
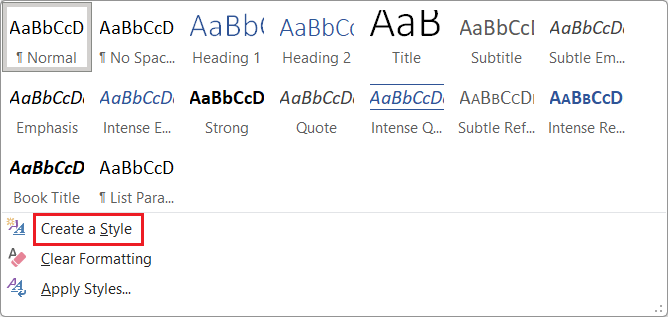
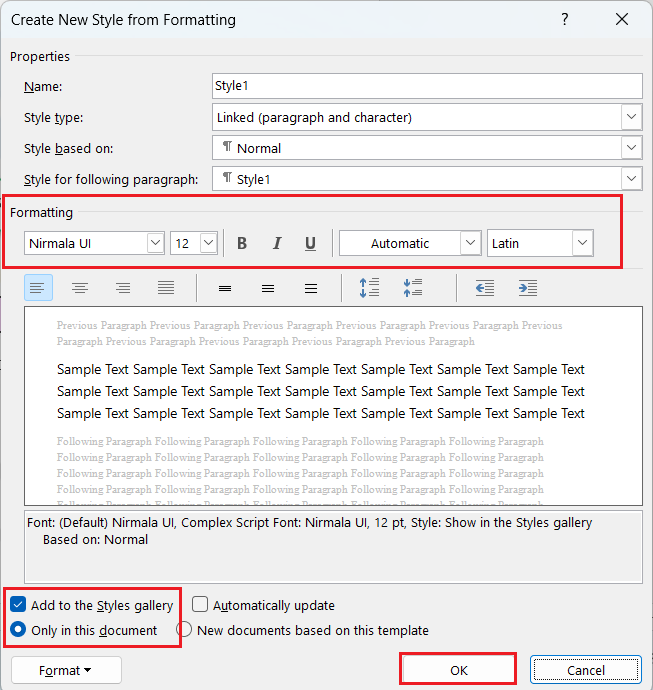
2. Name दें (जैसे: “Report Heading”)
3. Font, Size, Color, Alignment आदि चुनें
4. “Add to Template” टिक करें → OK
💡Tip: Custom Styles को Templates में Save किया जा सकता है (see below 👇).
Templates (ढाँचा या नमूना Document)
Template एक Pre-Formatted Document होता है जिसमें Layout, Fonts, Styles, Headers, और Placeholder Text पहले से होते हैं।
Example:
- Resume Template
- Invoice Template
- Certificate Template
Steps to Use Template:
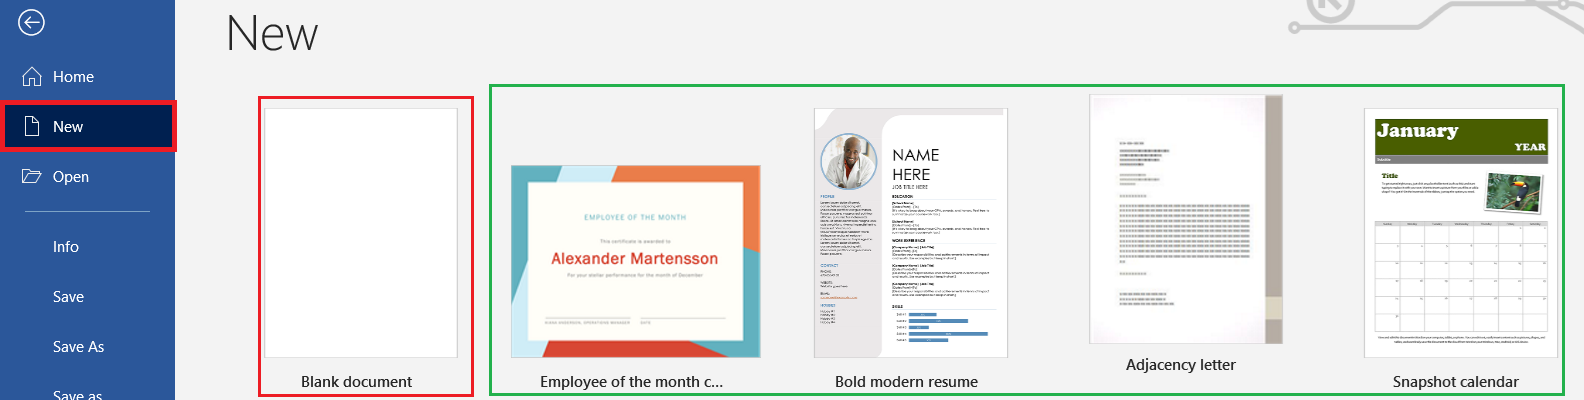
- File → New → Choose Template
- “Blank Document” या “Ready Template” चुनें
- Customize करें और Save करें
File Format: .dotx (Template)
Shortcut: Alt + F + N
💡Tip: ADCA Practical में “Create a Letterhead Template” एक Common Task होता है।
Creating Custom Template
Steps:
1. किसी Document को Format करें (Logo, Header/Footer आदि)
2. File → Save As → Save as type → Word Template (*.dotx)
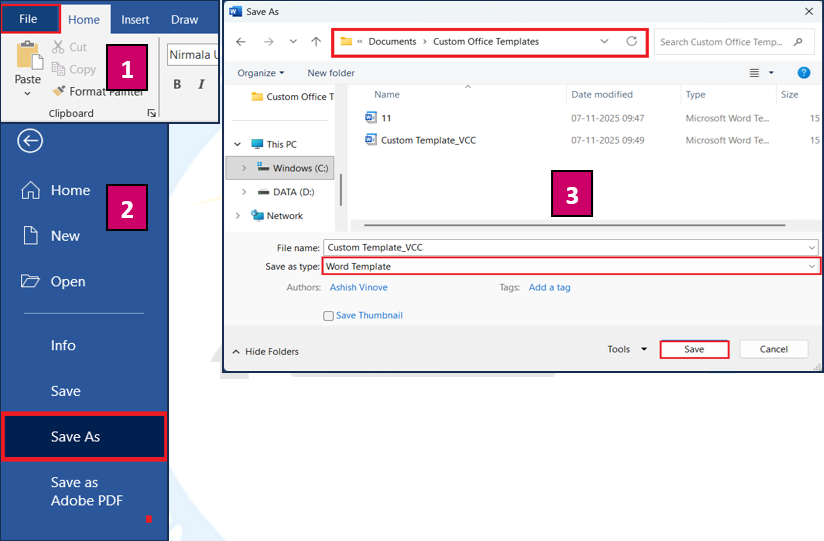
3. Save करें → Custom Office Templates Folder में
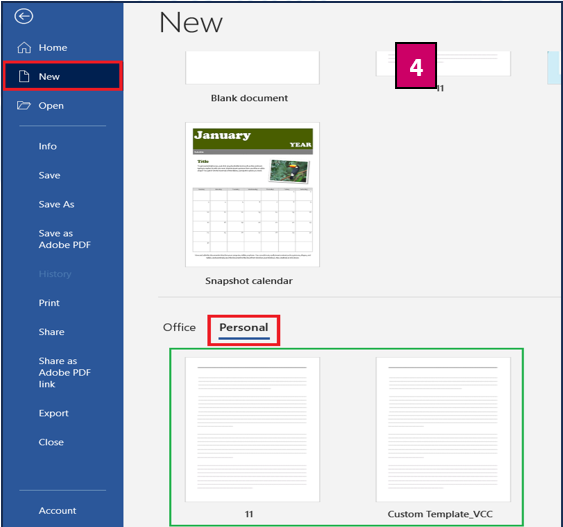
4. अब यह Template “File → New → Personal” में दिखेगा।
Macros (स्वचालित कार्य)
Macro एक ऐसा Script होता है जो दोहराए जाने वाले कार्य (Repeated Tasks) को Record करके उन्हें एक Command या Shortcut से चलाता है।
Example: हर Page पर Header जोड़ना, Text Formatting, Date Insertion आदि।
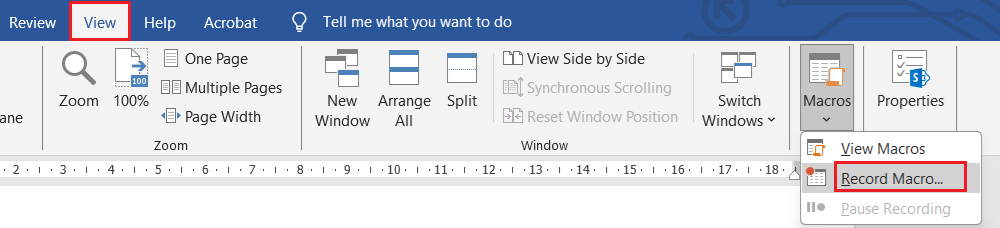
Access: View Tab → Macros → Record Macro
Steps:
1. View Tab → Macros → Record Macro
 2. Macro Name दें
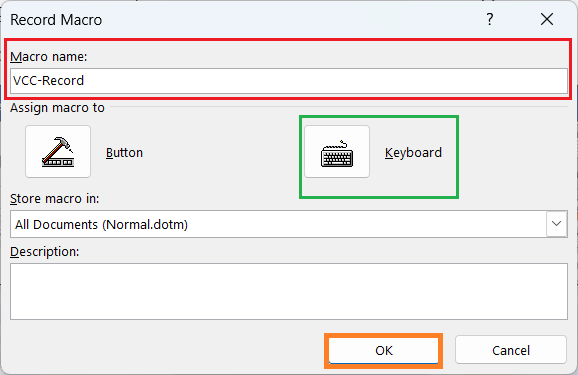
3. Keyboard Shortcut या Button Assign करें
4. वह कार्य करें जिसे Automate करना है
5. Stop Recording दबाएँ
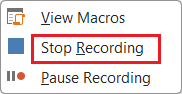
6. अब Shortcut से वही कार्य अपने-आप होगा
Shortcut to Run Macro: Alt + F8
💡Tip: Macros को .docm File Type में Save करें (Macro-Enabled Document)
File Type: .docm
Macro Storage: Normal.dotm Template
Macro Security Settings
Macros में कोड होते हैं, इसलिए Word सुरक्षा कारणों से पहले से Macro Execution बंद रखता है।
Enable करने के लिए:
File → Options → Trust Center → Trust Center Settings → Macro Settings → “Enable All Macros”
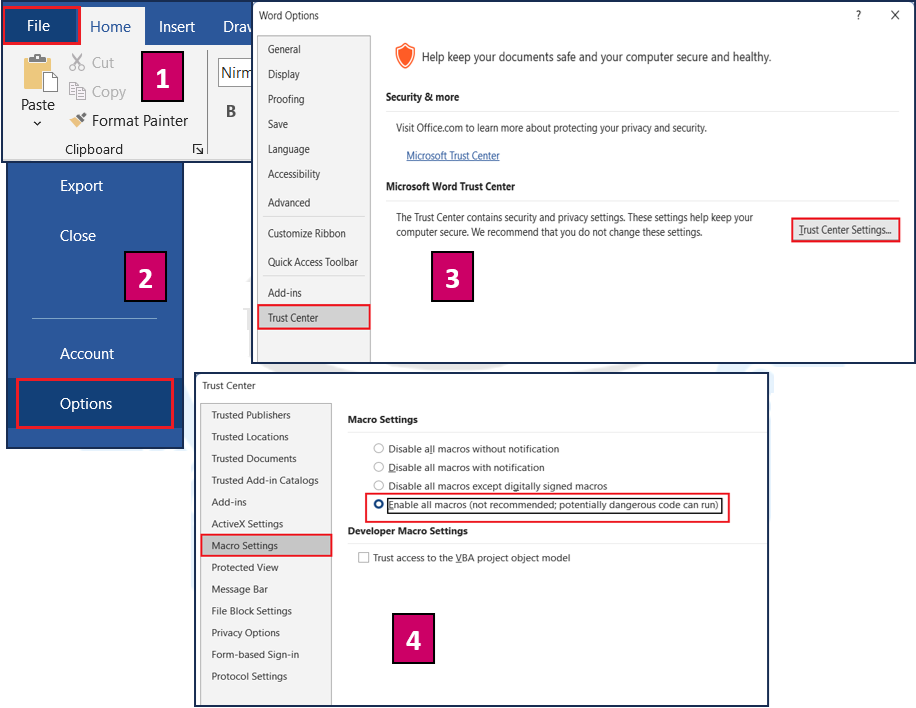
💡Note: केवल विश्वसनीय Documents में ही Macros सक्षम करें।
Document Protection (दस्तावेज़ सुरक्षा)
MS Word में Document को Unauthorized Access या Editing से बचाने के लिए विभिन्न Security Options उपलब्ध हैं।
Protection के प्रकार:
| प्रकार | विवरण |
| Read-Only Protection | केवल पढ़ा जा सकता है, Edit नहीं |
| Password Protection | File खोलने या Edit करने के लिए Password आवश्यक |
| Restrict Editing | केवल निश्चित क्षेत्र Edit किया जा सकता है |
Steps to Add Password: File → Info → Protect Document → Encrypt with Password → Enter Password
Shortcut: Alt + F + I + P
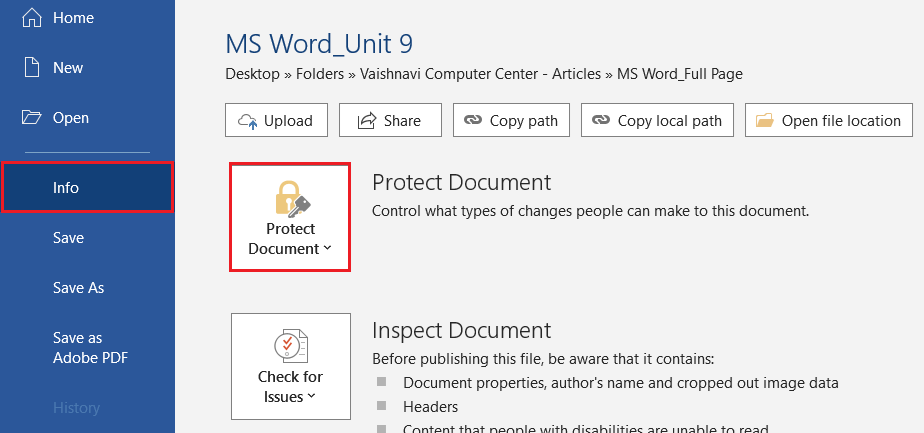
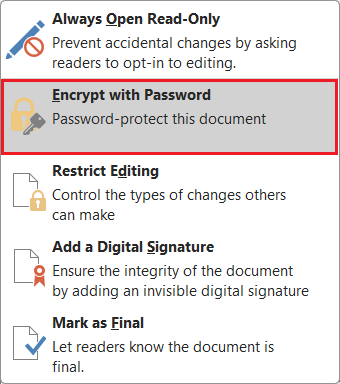
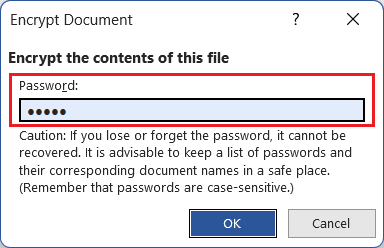
💡Tip: Password Case Sensitive होता है।
Restrict Editing
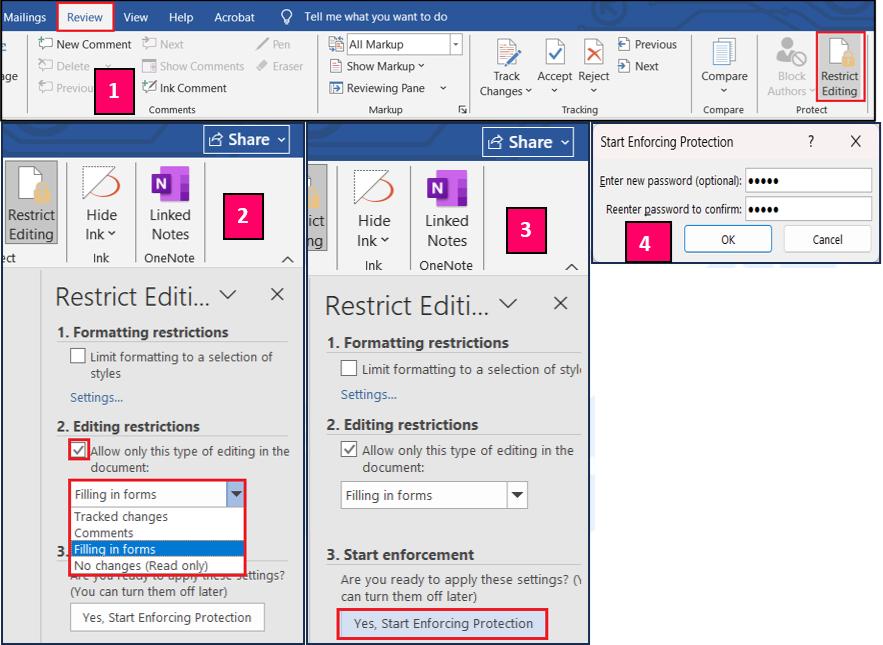
यदि आप Document के कुछ हिस्सों को ही Edit करने देना चाहते हैं तो “Restrict Editing” उपयोग करें।
Steps:
- Review Tab → Restrict Editing
- Tick “Allow only this type of editing”
- Choose → Filling in forms / Comments only
- Start Enforcement → Password लगाएँ
Shortcut: Alt + R + R
Example: Form Design में सिर्फ Name या Address Field Editable रखी जा सकती है।
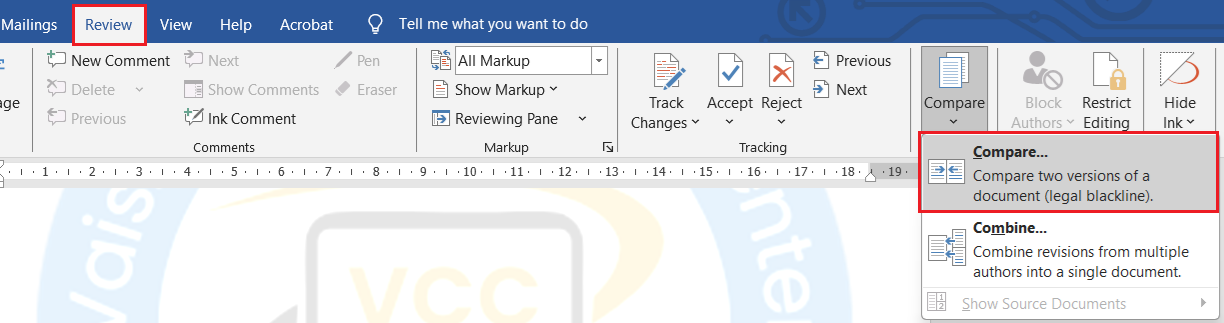
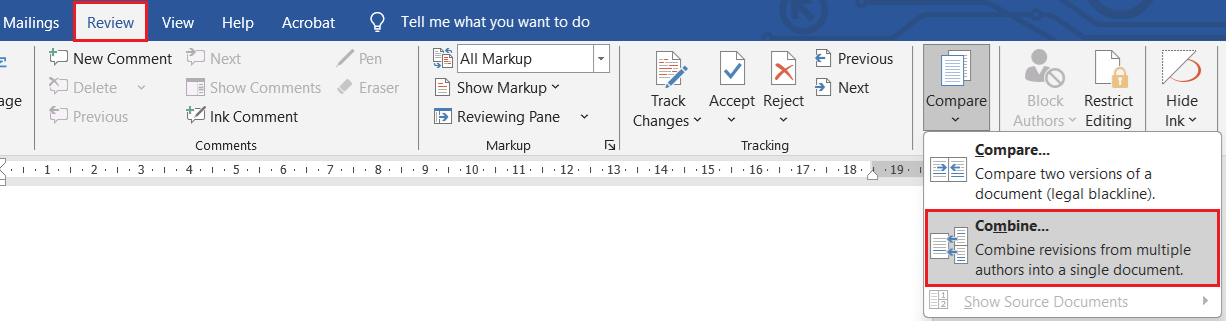
Compare & Combine Documents
जब एक Document की कई Versions होती हैं, तब “Compare” और “Combine” का प्रयोग किया जाता है।
| कार्य | विवरण |
| Compare | दो Documents के बीच अंतर दिखाता है |
| Combine | दो Edited Versions को Merge करता है |
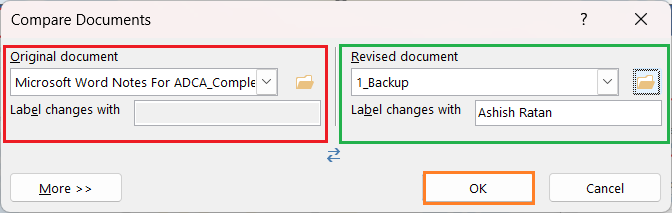
Steps to Compare:
- Review Tab → Compare → Compare Documents
- Original और Revised File चुनें → OK
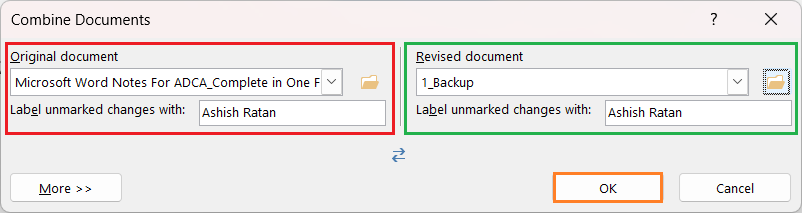
Steps to Combine:
- Review → Compare → Combine
- Files चुनें → OK
💡Tip: यह सुविधा Multi-user Editing में उपयोगी है।
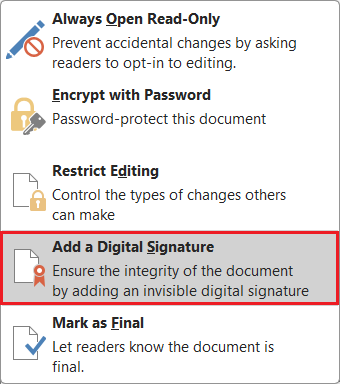
Protect Document with Digital Signature
Digital Signature से आप यह प्रमाणित कर सकते हैं कि Document Author Verified है और उसमें कोई बदलाव नहीं किया गया।
Steps: File → Info → Protect Document → Add a Digital Signature

💡Note: इसके लिए Computer में Digital Certificate Install होना चाहिए।
Advanced Customization
| कार्य | Shortcut / Menu |
| Styles Pane | Alt + Ctrl + Shift + S |
| Record Macro | Alt + W + M + R |
| Run Macro | Alt + F8 |
| Password Protection | Alt + F + I + P |
| Restrict Editing | Alt + R + R |
| Compare Documents | Alt + R + M |
| Digital Signature | File → Info → Protect Document |
Quick Summary (Unit 11 Revision Table)
| Feature | कार्य | Shortcut / Location |
| Styles | एक समान Formatting लागू करना | Alt + Ctrl + Shift + S |
| Template | Ready-made Layout बनाना | File → New |
| Macro | कार्यों को ऑटोमेट करना | Alt + F8 |
| Protect Document | File सुरक्षित करना | File → Info → Protect |
| Restrict Editing | Partial Edit Control | Review → Restrict Editing |
| Compare & Combine | Documents का अंतर दिखाना | Review → Compare |
| Digital Signature | Author Verify | File → Info → Add Signature |
Practical Task – Unit 11✍️Task (कार्य):
|
Unit 12: Integration & Sharing
यह यूनिट ADCA कोर्स में बहुत useful और professional-level माना जाता है, क्योंकि इसमें सिखाया जाता है कि MS Word को अन्य Programs (जैसे Excel, PowerPoint, OneDrive) से कैसे जोड़ा जाए और Documents को share या collaborate किया जाए।
Integration & Sharing क्या है?
Integration का मतलब है — Microsoft Word को अन्य Applications (Excel, PowerPoint, Outlook आदि) के साथ जोड़ना ताकि डेटा आसानी से साझा (Share) और उपयोग किया जा सके।
Sharing का मतलब है — Word Document को दूसरों के साथ साझा करना या एक साथ उस पर काम करना।
सरल शब्दों में:
- Integration = Linking Data between Applications
- Sharing = Working Together on a Single Document
Linking Excel Data to Word (Excel Data जोड़ना)
Word Document में Excel Sheet या उसका डेटा Insert किया जा सकता है, ताकि वह हमेशा Excel File से जुड़ा रहे।
Steps:
1. Excel में Data तैयार करें
2. Word खोलें → Insert Tab → Object → Object

3. Create from File → Browse → Excel File चुनें
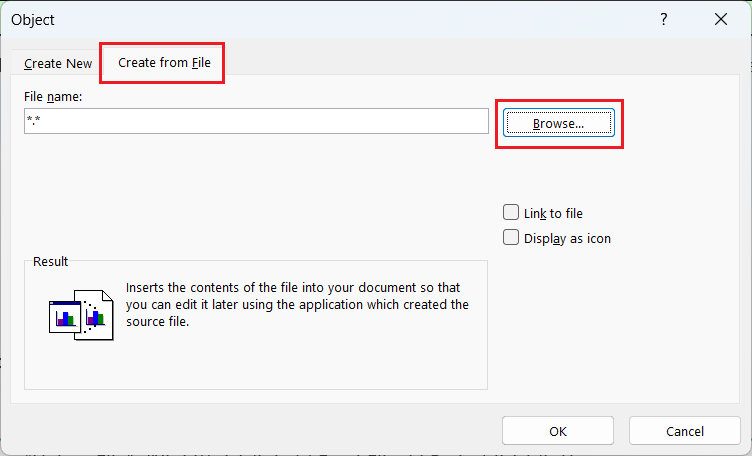
4. “Link to File” ✔ करें → OK
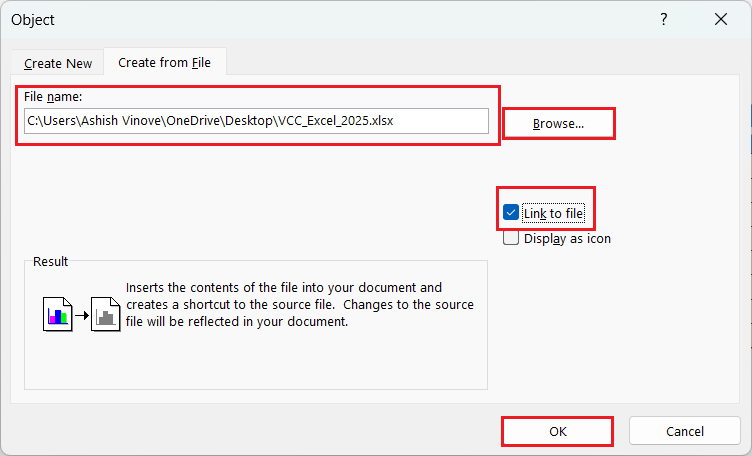
Result: अब Excel File में बदलाव करने पर Word Document अपने-आप Update हो जाएगा।
💡 Tip: “Link to File” तभी काम करता है जब Excel File का Path वही रहता है।
Embedding Excel Sheet (डेटा को Embed करना)
यदि आप चाहते हैं कि Excel Data Word में स्थायी रूप से जुड़ जाए (बिना Link के), तो “Embedding” करें।
Steps:
1. Insert → Object → Create from File → Excel File चुनें
2. “Link to File” Unchecked रखें → OK
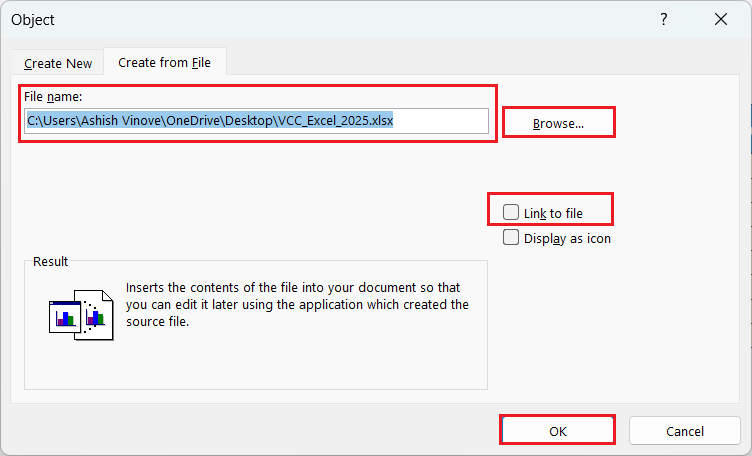
Shortcut: Alt + N + J
💡 Tip: Embedded Object File Size बढ़ाता है लेकिन Safe रहता है।
Insert Excel Table Directly (सीधा Excel Table जोड़ना)
Steps:
1. Insert → Table → Excel Spreadsheet
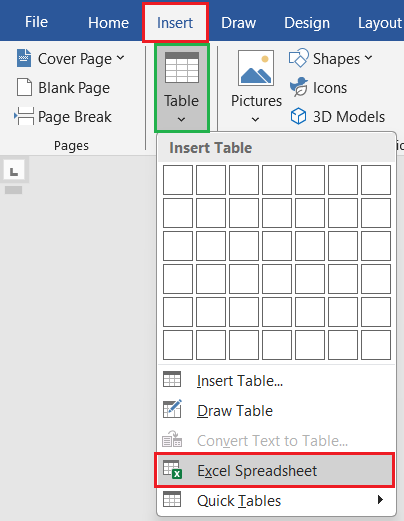
2. एक Mini Excel Grid खुलेगा → Data टाइप करें
3. बाहर Click करें → Excel Table Word में Convert हो जाएगी

Example: Marks Sheet, Salary Report, Data Comparison आदि।
💡 Tip: यह तरीका Mail Merge Data Tables के लिए भी Perfect है।
Linking Charts from Excel to Word
आप Excel का कोई Chart Word में Live Link के साथ जोड़ सकते हैं ताकि Excel में बदलाव होते ही Chart Update हो जाए।
Steps:
- Excel में Chart बनाएँ → Copy करें
- Word में Paste करें
- Paste Options → “Link & Keep Source Formatting” चुनें
Shortcut: Ctrl + Alt + V → Paste Special → Paste Link
Result: Chart हमेशा Excel Data से जुड़ा रहेगा।
Embedding Other Objects (PowerPoint, PDF, File)
Word में अन्य Files को भी Object के रूप में Embed किया जा सकता है।
Steps: Insert → Object → Create from File → File चुनें → Display as Icon ✔ करें → OK
Example:
- PowerPoint File
- PDF File
- Audio File
- Video File
![]()
![]()
Note: यदि आप चाहें तो File icon भी change कर सकते हैं। ऐसा करने के लिए, फ़ाइल को Browse और Display as icon को Check करने के बाद, Change Icon पर क्लिक करना है।
![]()
यहाँ से आप Icon को चुनने के बाद OK पर क्लिक करें। Icon बदल जाएगा।
![]()
![]()
💡 Tip: Presentation Reports या Combined Project Files के लिए बहुत उपयोगी।
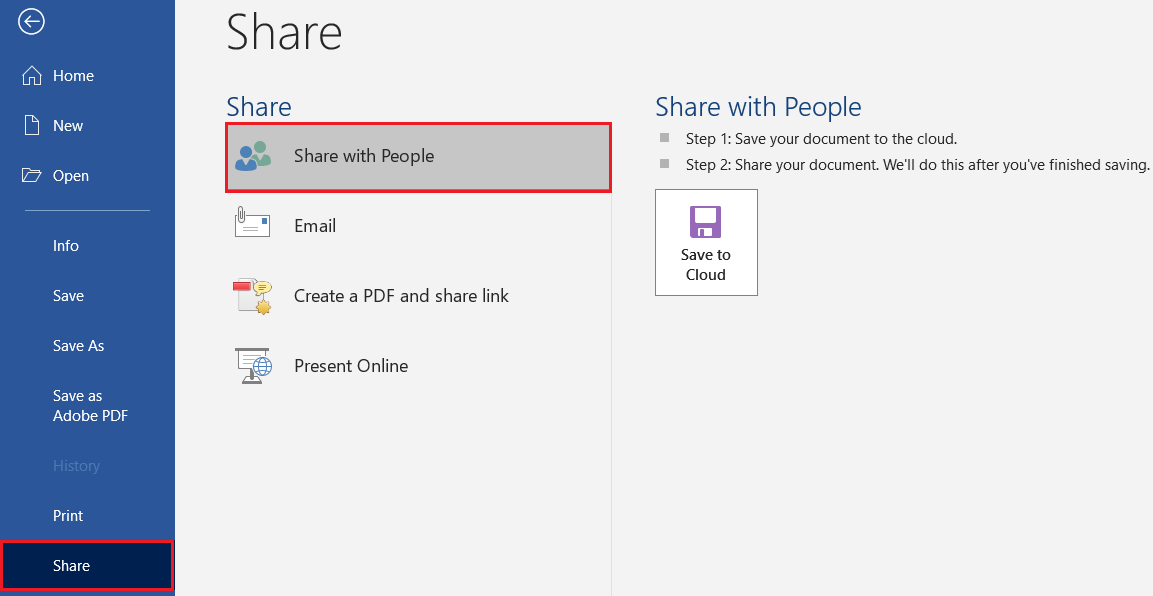
Sharing Word Documents via Email
MS Word से सीधे ईमेल द्वारा Document भेजा जा सकता है।
Steps: File → Share → Email → Send as Attachment
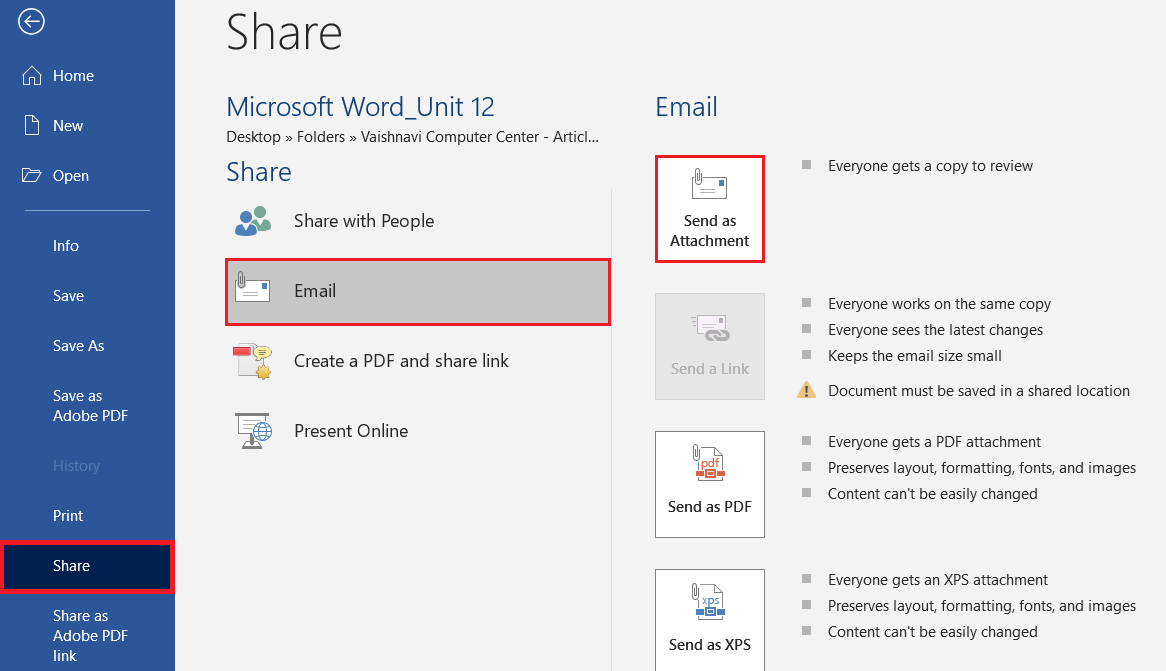
Shortcut: Alt + F + H + E
💡 Tip: अगर Outlook Install है, तो Mail सीधे खुल जाएगा।
💡 Option: “Send as PDF” चुनकर Document को PDF रूप में भेज सकते हैं।

Sharing via OneDrive (Cloud Sharing)
OneDrive Microsoft की Cloud Service है जो Online File Storage और Collaboration प्रदान करती है।
Steps:
1. File → Save As → OneDrive Account चुनें
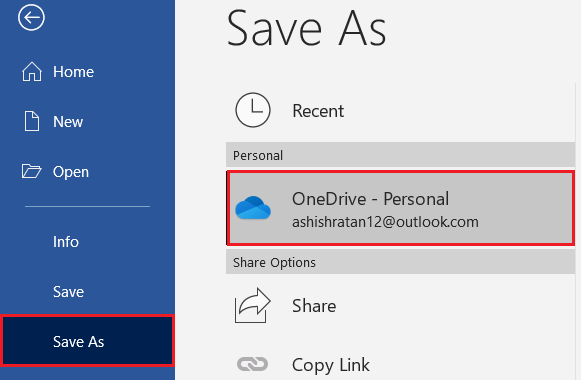
2. Document Save करें
3. File → Share → Invite People → Email ID डालें
4. Permission चुनें: Can Edit / Can View
Result: अब कई लोग एक साथ उसी Document पर Online Editing कर सकते हैं।
Shortcut: Alt + F + H + I
💡 Tip: OneDrive Sharing के लिए Internet और Microsoft Account आवश्यक है।
Real-Time Collaboration (सह-कार्य)
Office 365 / Word 2021 में एक Document पर कई Users एक साथ Editing कर सकते हैं।
Steps:
- File → Share → Invite People
- Link भेजें
- जब दूसरा व्यक्ति Document खोलेगा, उसका Cursor रियल-टाइम में दिखेगा
💡 Tip: आप “Comments” और “Track Changes” के साथ भी काम कर सकते हैं।
Using Comments for Collaboration
Comments के ज़रिए Team Members एक-दूसरे को Feedback दे सकते हैं।
Steps:
- Text Select करें
- Review → New Comment
- Feedback लिखें
Shortcut: Ctrl + Alt + M
💡 Tip: “Resolve” या “Reply” Option से Comment Discussion को नियंत्रित किया जा सकता है।
Compare & Merge Shared Versions
जब Shared Document में कई Copies बन जाती हैं, तो आप उन्हें Merge कर सकते हैं।
Steps: Review → Compare → Combine Documents
💡 Tip: यह Feature Multi-user Project Report Finalization में बहुत मदद करता है।
Restrict Access (Document Permissions)
OneDrive या Share किए गए Document में आप यह तय कर सकते हैं कि कौन Edit कर सकता है और कौन सिर्फ देख सकता है।
Steps:
- File → Share → Manage Access
- Change Permission → Can Edit / Can View
💡 Tip: Sensitive Reports के लिए “View Only” Permission देना बेहतर है।
Embedding vs Linking (मुख्य अंतर)
| आधार | Embedding | Linking |
| Data Storage | Data Document में Copy होता है | Data Source File से जुड़ा रहता है |
| File Size | अधिक | कम |
| Auto Update | नहीं | हाँ |
| Editing | Word में होता है | Source File में |
| Best For | Permanent Data | Dynamic Data |
Example:
- Marks Report (Link Excel)
- Certificate Format (Embed Logo)
Quick Summary (Unit 12 Revision Table)
| कार्य | Shortcut / Menu |
| Insert Object | Alt + N + J |
| Paste Link | Ctrl + Alt + V |
| Send Email | Alt + F + H + E |
| Save to OneDrive | Alt + F + A + 1 |
| Share Invite | Alt + F + H + I |
| Comment | Ctrl + Alt + M |
| Compare / Combine | Alt + R + M |
Practical Task – Unit 12✍️Task (कार्य):
|
Unit 13: Keyboard Shortcuts
यह यूनिट ADCA के लिए Revision Booster की तरह है — क्योकि Word के Shortcut Keys याद होना न सिर्फ Practical Exams में समय बचाता है बल्कि Interview में भी अक्सर पूछे जाते हैं।
Keyboard Shortcuts क्या हैं?
Keyboard Shortcut एक ऐसी कुंजी-संयोजन (Key Combination) होती है जिससे आप बिना Mouse का उपयोग किए तेज़ी से कोई Command चला सकते हैं।
सरल शब्दों में: Shortcut = “Speed Key” for Fast Commands in Word
Basic File Operations Shortcuts
| कार्य | Shortcut Key | विवरण |
| New Document | Ctrl + N | नया Document बनाना |
| Open Document | Ctrl + O | पुराना Document खोलना |
| Save Document | Ctrl + S | Document Save करना |
| Save As | F12 | Save As Dialog खोलना |
| Print Document | Ctrl + P | Print Window खोलना |
| Close Document | Ctrl + W | Document बंद करना |
| Exit Word | Alt + F4 | Word बंद करना |
| Open Recent Files | Alt + F + R | हाल के Documents देखना |
💡 Tip: Save बार-बार करें — Word में “AutoRecover” सुविधा तभी काम करती है जब File पहले Save की गई हो।
Text Editing Shortcuts
| कार्य | Shortcut | विवरण |
| Cut | Ctrl + X | Text हटाकर Clipboard में रखना |
| Copy | Ctrl + C | Text की Copy बनाना |
| Paste | Ctrl + V | Clipboard से Text डालना |
| Undo | Ctrl + Z | पिछला कार्य रद्द करना |
| Redo / Repeat | Ctrl + Y / F4 | Undo को दोबारा लागू करना |
| Delete Word (Right) | Ctrl + Delete | अगला शब्द हटाना |
| Delete Word (Left) | Ctrl + Backspace | पिछला शब्द हटाना |
| Select All | Ctrl + A | पूरा Document चुनना |
| Find | Ctrl + F | Text खोजना |
| Replace | Ctrl + H | Text बदलना |
| Go To | Ctrl + G | किसी Page, Section, Line पर जाना |
💡 Tip: F4 = Repeat Last Action (Formatting सहित)
Text Formatting Shortcuts
| कार्य | Shortcut | विवरण |
| Bold | Ctrl + B | Text मोटा करना |
| Italic | Ctrl + I | Text तिरछा करना |
| Underline | Ctrl + U | Text के नीचे Line लगाना |
| Strikethrough | Ctrl + 5 (NumPad) | Text के बीच Line लगाना |
| Superscript | Ctrl + Shift + + | Text ऊपर उठाना (x²) |
| Subscript | Ctrl + = | Text नीचे लाना (H₂O) |
| Change Case | Shift + F3 | Upper/Lower Case बदलना |
| Clear Formatting | Ctrl + Spacebar | Formatting हटाना |
| Increase Font Size | Ctrl + Shift + > | Font बड़ा करना |
| Decrease Font Size | Ctrl + Shift + < | Font छोटा करना |
| Highlight | Alt + H + I | Text Highlight करना |
| Font Dialog Box | Ctrl + D | Font Options खोलना |
💡 Tip: Ctrl + Shift + C / V = Copy & Paste Formatting only (Format Painter Shortcut)
Paragraph Formatting Shortcuts
| कार्य | Shortcut | विवरण |
| Left Align | Ctrl + L | Text को बाएँ Align करना |
| Center Align | Ctrl + E | Text को बीच में रखना |
| Right Align | Ctrl + R | Text को दाएँ Align करना |
| Justify | Ctrl + J | Text को दोनों किनारों पर समान करना |
| Increase Indent | Ctrl + M | Paragraph अंदर करना |
| Decrease Indent | Ctrl + Shift + M | Paragraph बाहर करना |
| Line Spacing 1.0 | Ctrl + 1 | Single Spacing |
| Line Spacing 1.5 | Ctrl + 5 | 1.5 Spacing |
| Line Spacing 2.0 | Ctrl + 2 | Double Spacing |
| Bulleted List | Ctrl + Shift + L | Bullets जोड़ना |
| Paragraph Dialog Box | Alt + O + P | Paragraph Settings खोलना |
Page & Document Formatting Shortcuts
| कार्य | Shortcut | विवरण |
| Page Break | Ctrl + Enter | नया Page शुरू करना |
| Column Break | Ctrl + Shift + Enter | Columns के बीच Break |
| Open Page Setup | Alt + P + S + P | Page Setup Box |
| View Print Layout | Alt + Ctrl + P | Print Layout View |
| View Outline | Alt + Ctrl + O | Outline View |
| View Draft | Alt + Ctrl + N | Draft View |
| Show Ruler | Alt + W + R | Ruler दिखाना / छिपाना |
| Zoom In | Alt + W + Q + Tab + Enter | Zoom Dialog |
Table Shortcuts
| कार्य | Shortcut | विवरण |
| Insert Table | Alt + N + T | Table डालना |
| Move to Next Cell | Tab | अगला Cell चुनना |
| Move to Previous Cell | Shift + Tab | पिछला Cell चुनना |
| Insert Row Below | Alt + JL + B | नीचे Row जोड़ना |
| Insert Row Above | Alt + JL + A | ऊपर Row जोड़ना |
| Insert Column Right | Alt + JL + R | दाईं ओर Column जोड़ना |
| Merge Cells | Alt + JL + M | Cells को मिलाना |
| Split Cells | Alt + JL + P | Cells को विभाजित करना |
| Sort Table | Alt + JL + SO | Data को क्रमबद्ध करना |
| Formula | Alt + JL + FO | गणना करना |
| Select Table | Alt + JT + A | पूरी Table चुनना |
Object, Picture & Shape Shortcuts
| कार्य | Shortcut | विवरण |
| Insert Picture | Alt + N + P | Picture डालना |
| Insert Shape | Alt + N + SH | Shape डालना |
| Insert WordArt | Alt + N + W | Decorative Text |
| Insert Chart | Alt + N + C | Chart डालना |
| Wrap Text | Alt + JP + TW | Text को Picture के चारों ओर रखना |
| Group Objects | Ctrl + G | कई Objects को Group करना |
| Ungroup Objects | Ctrl + Shift + G | Group हटाना |
| Rotate Object | Alt + JP + RO | Object को घुमाना |
Proofing & Review Shortcuts
| कार्य | Shortcut | विवरण |
| Spelling & Grammar Check | F7 | गलतियाँ सुधारना |
| Thesaurus | Shift + F7 | समानार्थी शब्द |
| Word Count | Ctrl + Shift + G | शब्द गिनना |
| Comment | Ctrl + Alt + M | टिप्पणी जोड़ना |
| Track Changes | Ctrl + Shift + E | बदलाव ट्रैक करना |
| Accept Change | Alt + Shift + A | बदलाव स्वीकार करना |
| Reject Change | Alt + Shift + R | बदलाव अस्वीकार करना |
Mail Merge Shortcuts
| कार्य | Shortcut | विवरण |
| Start Mail Merge | Alt + M + S | मेल मर्ज शुरू करना |
| Select Recipients | Alt + M + S + R | डेटा स्रोत चुनना |
| Insert Merge Field | Alt + M + I | Field डालना |
| Preview Results | Alt + M + P | मर्ज परिणाम देखना |
| Finish & Merge | Alt + M + F | मेल मर्ज पूरा करना |
Security & Protection Shortcuts
| कार्य | Shortcut | विवरण |
| Restrict Editing | Alt + R + R | Editing सीमित करना |
| Password Protect | Alt + F + I + P | पासवर्ड लगाना |
| Compare Documents | Alt + R + M | दो Documents की तुलना |
| Digital Signature | File → Info → Add Signature | दस्तावेज़ प्रमाणित करना |
Integration & Sharing Shortcuts
| कार्य | Shortcut | विवरण |
| Insert Object | Alt + N + J | Object जोड़ना |
| Paste Link | Ctrl + Alt + V | Excel / Chart लिंक करना |
| Send via Email | Alt + F + H + E | ईमेल से भेजना |
| Save to OneDrive | Alt + F + A + 1 | Cloud पर Save करना |
| Share Invite | Alt + F + H + I | Invite भेजना |
Navigation Shortcuts
| कार्य | Shortcut | विवरण |
| Start of Line | Home | पंक्ति की शुरुआत |
| End of Line | End | पंक्ति का अंत |
| Start of Document | Ctrl + Home | दस्तावेज़ की शुरुआत |
| End of Document | Ctrl + End | दस्तावेज़ का अंत |
| Next Word | Ctrl + → | अगला शब्द |
| Previous Word | Ctrl + ← | पिछला शब्द |
| Next Paragraph | Ctrl + ↓ | अगला Paragraph |
| Previous Paragraph | Ctrl + ↑ | पिछला Paragraph |
Useful Function Keys
| Key | कार्य |
| F1 | Help खोलना |
| F2 | Move Text |
| F4 | Repeat Last Action |
| F5 | Go To Dialog Box |
| F7 | Spell Check |
| F8 | Extend Selection |
| F9 | Update Field |
| F12 | Save As |
| Shift + F3 | Change Case |
| Shift + F7 | Thesaurus |
Quick Revision (ADCA Shortcut Summary Sheet)
| Category | Shortcut Count | Example |
| File Operations | 8 | Ctrl + S, Ctrl + O |
| Editing | 10 | Ctrl + X, Ctrl + V |
| Formatting | 12 | Ctrl + B, Ctrl + U |
| Paragraph | 10 | Ctrl + E, Ctrl + J |
| Tables | 10 | Alt + N + T |
| Proofing | 6 | F7, Ctrl + Alt + M |
| Mail Merge | 5 | Alt + M + S |
| Security | 4 | Alt + R + R |
| Integration | 4 | Alt + F + H + I |
| Total | ≈70+ Shortcuts | 🔥 Master All for ADCA Practical! |
Practical Task – Unit 13✍️Task (कार्य):
|
Unit 14: Practical Exercises
यह यूनिट आपके ADCA Practical Exam, Viva और Real-life Applications** तीनों के लिए सबसे काम का भाग है।
यहाँ दिए गए Exercises ऐसे बनाए गए हैं जो Word की सभी Features को एक साथ कवर करते हैं —
(Formatting + Tables + Mail Merge + Graphics + Page Design + PDF Export)
इस यूनिट में आप सीखेंगे 👇
- वास्तविक Documents (Resume, Certificates, Report,) बनाना
- Formatting, Mail Merge, Table, Graphics का व्यावहारिक उपयोग
- ADCA Practical Paper Pattern के अनुसार अभ्यास
Practical Exercise 1 — Resume / Bio-Data
Objective: Professional Resume तैयार करना
Steps:
1. नया Document खोलें
2. Page Setup → Margins = Normal, Orientation = Portrait
3. Heading लिखें: “Curriculum Vitae” → Font = Cambria, Size = 20, Bold & Center
4. नीचे यह Structure बनाएँ —
Name: [Your Name]
Address: [Your Address]
Email: [your@email.com]
Mobile: [Your Number]
Educational Details (Table Format):
| Qualification | Board/University | Year | Percentage |
| High School | CBSE | 2021 | 80% |
| Intermediate | UP Board | 2023 | 85% |
| ADCA | DOEACC | 2025 | 90% |
5. Skills List (Bullets में):
- MS Word, Excel, PowerPoint
- Internet & Email
- Data Entry
6. Signature Section बनाएं:
Right Align →
(Signature)
Date: __________
💡 Extra Task:
- Insert Border → Page Border → Box Style
- Save As →docx
Practical Exercise 2 — Project Report (with TOC + Header/Footer + Watermark)
Objective: A4 Size Project Report बनाना
Steps:
1. Cover Page बनाएँ:
- Title: “Project Report on MS Word”
- Subtitle: “Submitted for ADCA Course”
- Insert Picture (Logo)
- Add Watermark: “Confidential”
2. Header/Footer डालें:
- Header: ADCA Project – Microsoft Word
- Footer: Page Number (Bottom Center)
3. Use “Heading Styles” for these Topics:
- Introduction
- Word Features
- Formatting Tools
- Tables & Charts
- Conclusion
4. Table of Contents डालें:
References → Table of Contents → Automatic Table
5. Print Preview देखें और Save करें नाम से: ADCA_ProjectReport.docx
💡 Tip: इस Document में “Design Theme – Ion” प्रयोग करें।
Practical Exercise 3 — Certificate Creation
Objective: Certificate Template बनाना
Steps:
1. Page Orientation → Landscape
2. Page Border → Double Line (Dark Blue)
3. Insert Shape → Rectangle (Header Box)
4. Inside Box लिखें:
“Certificate of Achievement” → Font: Algerian, Size 28, Color Blue
5. नीचे Text लिखें:
“This Certificate is proudly presented to <<Name>> for successfully completing the ADCA Course with distinction.”
6. Insert WordArt: “CONGRATULATIONS!”
7. Footer में Signatures के लिए दो Text Boxes बनाएँ:
Director’s Signature — Left
Coordinator’s Signature — Right
💡 Mail Merge Integration:
- Data Source Excel File बनाकर Certificates में Names Auto-Fill करें
- Save As: Certificate_Template.dotx
Practical Exercise 4 — Marksheet (with Table Formula)
Objective: Table & Formula का उपयोग
Steps:
1. Insert Table → 6 Columns × 7 Rows
2. Headings लिखें:
| Roll No | Name | Subject 1 | Subject 2 | Subject 3 | Total |
| 101 | Ravi | 78 | 82 | 85 | |
| 102 | Pooja | 72 | 80 | 86 | |
| 103 | Amit | 88 | 90 | 92 |
3. Last Column (Total) में Formula लगाएँ:
Layout Tab → Formula → =SUM(LEFT)
4. Add Caption: Table 1: Student Marks Record
5. Sort Data by Name (Layout → Sort)
6. Save File: Marksheet_Unit14.docx
💡 Tip: आप इस Table को Excel से भी Link कर सकते हैं।
Practical Exercise 5 — Mail Merge for Result Letters
Objective: Mail Merge का प्रयोग
Steps:
- Letter Template बनाएं:
- प्रिय <<Name>>,
- आपका RollNo <<RollNo>> है और आपने <<Marks>> अंक प्राप्त किए हैं।
- बधाई हो!
- Data Source Excel File बनाएं:
| Name | RollNo | Marks | - Mailings → Start Mail Merge → Letters
- Select Recipients → Use Existing List → Excel File चुनें
- Insert Merge Fields
- Preview Results → Finish & Merge
- Save File: MailMerge_Result.docx
Practical Exercise 6 — Newsletter / Brochure Design
Objective: Page Design & Columns Practical’s
Steps:
- Page Layout → Columns → 2
- Insert Shapes → Banners, Lines, Icons
- Add Images with Wrap Text: “Square”
- Insert Heading: “Monthly Computer Bulletin”
- Insert Table for “Upcoming Courses”
- Page Color → Light Gray
- Page Border → Box (Dark Gray)
- Save File: Newsletter_Unit14.docx
💡 Tip: यह Project “Page Design & Themes” को Demonstrate करता है।
Practical Exercise 7 — PDF Creation & Export
Objective: Document को PDF में बदलना
Steps:
- किसी भी Document को खोलें
- File → Save As → “Save as Type” → PDF चुनें
- Save करें
- Check File Output
Shortcut: Alt + F + A + F
💡 Tip: “Minimum Size (Online)” Option PDF को Lightweight बनाता है।
Practical Exercise 8 — Protected Form Creation
Objective: Fillable Form बनाना
Steps:
- Enable Developer Tab (File → Options → Customize Ribbon → Developer ✔)
- Developer Tab → Insert → Text Form Field, Check Box, Drop-down
- Review → Restrict Editing → Allow Filling Forms
- Password Set करें
- Save File: ProtectedForm_Unit14.docx
Example: Admission Form, Application Form, etc.
ADCA Practical Exam Pattern (Word Section)
| Practical Task | Marks |
| Resume Preparation | 10 |
| Table / Marksheet | 10 |
| Mail Merge | 10 |
| Certificate / Report | 10 |
| PDF Export & Print | 5 |
| Formatting & Shortcuts | 5 |
| Total | 50 Marks |
💡 Passing Criteria: Minimum 25 Marks (with 60% accuracy in formatting).
Quick Summary – Unit 14 Revision Table
| Project Type | Features Covered | File Name |
| Resume | Table, Alignment, Border | Resume_Unit14.docx |
| Report | TOC, Header/Footer, Watermark | ADCA_ProjectReport.docx |
| Certificate | Shape, WordArt, Merge | Certificate_Template.dotx |
| Marksheet | Table Formula | Marksheet_Unit14.docx |
| Mail Merge | Data Integration | MailMerge_Result.docx |
| Newsletter | Columns, Design, Images | Newsletter_Unit14.docx |
| PDF Export | Save As PDF | Document.pdf |
| Protected Form | Restrict Editing | ProtectedForm_Unit14.docx |
Unit 15: Quick Summary + Viva Question Bank
यह यूनिट आपकी पूरी तैयारी को मजबूत करने के लिए बनाई गई है — इसमें हैं:
- Microsoft Word के सभी 14 Units का Quick Summary
- 100+ Viva Questions with Answers (ADCA, CCC, & Practical Exam Focused)
Microsoft Word Quick Summary (Unit-Wise Recap)
| Unit No. | Title | Key Points (Summary) |
| 1 | Introduction to Word Processing | MS Word एक Word Processing Software है, जिसका उपयोग Text Document तैयार करने के लिए किया जाता है। |
| 2 | Creating, Opening & Saving Documents | New (Ctrl+N), Open (Ctrl+O), Save (Ctrl+S), Print (Ctrl+P), File Types: .docx, .pdf |
| 3 | Text Formatting | Bold (Ctrl+B), Italic (Ctrl+I), Underline (Ctrl+U), Alignment, Line Spacing, Bullets, Borders, Shading |
| 4 | Page Setup & Printing | Margins, Orientation, Size, Page Breaks, Header/Footer, Page Numbers, Print Preview |
| 5 | Working with Tables | Insert Table, Merge/Split Cells, Formula (=SUM(LEFT)), Borders, Sorting, Table Styles |
| 6 | Graphics & Objects | Insert Picture, Shapes, WordArt, SmartArt, Charts, Text Wrapping, Grouping |
| 7 | Page Design & Themes | Themes, Colors, Fonts, Page Borders, Page Color, Watermark |
| 8 | Mail Merge & Labels | Main Document + Data Source + Merge Fields = Personalized Letters/Certificates |
| 9 | Proofing Tools | Spell Check (F7), Grammar, AutoCorrect, Thesaurus, Track Changes, Comments |
| 10 | References & Indexing | TOC, Footnotes, Citations, Captions, Cross-References, Index |
| 11 | Advanced Features | Styles, Templates, Macros, Document Protection, Compare & Combine |
| 12 | Integration & Sharing | Linking Excel Data, Embedding Objects, OneDrive Sharing, Collaboration |
| 13 | Keyboard Shortcuts | 70+ Important Shortcuts for Editing, Formatting, Tables, Mail Merge, etc. |
| 14 | Practical Exercises | Resume, Report, Certificate, Marksheet, Mail Merge, PDF Export, Forms |
| 15 | Quick Revision & Viva | Exam-Oriented Q&A and Recap for ADCA Viva + Practical Preparation |
ADCA Viva Question Bank (100+ Questions & Answers in Hindi)
(Unit-Wise, Compact & Real Exam Based)
Unit 1 – Introduction to MS Word
प्रश्न1. MS Word क्या है?
उत्तर: यह Microsoft द्वारा विकसित एक Word Processing Software है।
प्रश्न 2. Word File का Default Extension क्या होता है?
उत्तर: .docx
प्रश्न 3. Word Document का उपयोग कहाँ किया जाता है?
उत्तर: Letters, Reports, Certificates, Resumes आदि बनाने में।
प्रश्न 4. MS Word का पहला Version कब आया था?
उत्तर: वर्ष 1983 में (Word 1.0 for MS-DOS) ।
Unit 2 – Document Creation & Saving
प्रश्न 5. नया Document खोलने का Shortcut क्या है?
उत्तर: Ctrl + N
प्रश्न 6. Save और Save As में क्या अंतर है?
उत्तर: Save पुराने File को Update करता है; Save As नई Copy बनाता है।
प्रश्न 7. File → Print का उपयोग क्या है?
उत्तर: Document को Printer से Print करने के लिए।
प्रश्न 8. Default File Location कहाँ होती है?
उत्तर: Documents Folder में।
Unit 3 – Text Formatting
प्रश्न 9. Bold, Italic, Underline के Shortcuts बताइए।
उत्तर: Ctrl+B, Ctrl+I, Ctrl+U
प्रश्न 10. Change Case का उपयोग क्या है?
उत्तर: Text को Upper, Lower या Sentence Case में बदलने के लिए।
प्रश्न 11. Clear Formatting का Shortcut क्या है?
उत्तर: Ctrl + Spacebar
प्रश्न 12. Paragraph Alignment के कितने प्रकार हैं?
उत्तर: 4 प्रकार — Left, Center, Right, Justify
Unit 4 – Page Setup & Printing
प्रश्न 13. Orientation के प्रकार बताइए।
उत्तर: Portrait और Landscape
प्रश्न 14. Header/Footer क्या है?
उत्तर: Page के ऊपर और नीचे का भाग जहाँ Title या Page Number जोड़ा जाता है।
प्रश्न 15. Print Preview का उपयोग क्यों किया जाता है?
उत्तर: Printing से पहले Document को देखने के लिए।
Unit 5 – Tables
प्रश्न 16. Table क्या है?
उत्तर: Rows और Columns में डेटा दिखाने का ढाँचा।
प्रश्न 17. Merge Cells का कार्य क्या है?
उत्तर: एक से अधिक Cells को मिलाना।
प्रश्न 18. Table में Formula कैसे लगाते हैं?
उत्तर: Layout → Formula → Example: =SUM(LEFT)
Unit 6 – Graphics & Objects
प्रश्न 19. WordArt का उपयोग क्या है?
उत्तर: Text को Decorative रूप देने के लिए।
प्रश्न 20. SmartArt का उपयोग कहाँ होता है?
उत्तर: Process, Hierarchy या Cycle Diagram दिखाने के लिए।
प्रश्न 21. Picture Insert करने का Shortcut क्या है?
उत्तर: Alt + N + P
Unit 7 – Page Design & Themes
प्रश्न 22. Page Border लगाने का Menu कौन-सा है?
उत्तर: Design Tab → Page Borders
प्रश्न 23. Watermark क्या है?
उत्तर: पृष्ठ के पीछे हल्का Text/Image।
प्रश्न 24. Page Color बदलने का Menu?
उत्तर: Design → Page Color
Unit 8 – Mail Merge
प्रश्न 25. Mail Merge क्या है?
उत्तर: एक ही Document को अलग-अलग डेटा के साथ तैयार करना।
प्रश्न 26. Mail Merge के मुख्य भाग कौन से हैं?
उत्तर: Main Document, Data Source, Merge Fields, Merged Document
प्रश्न 27. Mail Merge का Shortcut Menu?
उत्तर: Mailings Tab → Start Mail Merge
Unit 9 – Proofing Tools
प्रश्न 28. Spell Check का Shortcut क्या है?
उत्तर: F7
प्रश्न 29. AutoCorrect का उपयोग क्या है?
उत्तर: टाइपिंग की सामान्य गलतियाँ अपने-आप सुधारना।
प्रश्न 30. Comments जोड़ने का Shortcut?
उत्तर: Ctrl + Alt + M
प्रश्न 31. Track Changes का उद्देश्य क्या है?
उत्तर: Document में किए गए बदलावों को Track करना।
Unit 10 – References & Indexing
प्रश्न 32. Table of Contents क्या है?
उत्तर: Document की Headings की सूची।
प्रश्न 33. Footnote और Endnote में अंतर?
उत्तर: Footnote Page के नीचे, Endnote Document के अंत में।
प्रश्न 34. Citation क्या है?
उत्तर: किसी स्रोत का संदर्भ देना।
प्रश्न 35. Index का उपयोग क्या है?
उत्तर: Keywords और उनके Page Numbers की सूची बनाना।
Unit 11 – Advanced Features
प्रश्न 36. Style क्या है?
उत्तर: Predefined Formatting का समूह।
प्रश्न 37. Template क्या होता है?
उत्तर: Ready-made Document Format।
प्रश्न 38. Macro क्या करता है?
उत्तर: दोहराए जाने वाले कार्य को Record कर स्वचालित करता है।
प्रश्न 39. Document Protect करने का तरीका?
उत्तर: File → Info → Protect Document
Unit 12 – Integration & Sharing
प्रश्न 40. Excel Data को Word में कैसे Link करते हैं?
उत्तर: Insert → Object → Link to File
प्रश्न 41. OneDrive क्या है?
उत्तर: Microsoft की Cloud Storage Service।
प्रश्न 42. Document Share करने का Shortcut?
उत्तर: Alt + F + H + I
Unit 13 – Keyboard Shortcuts
प्रश्न 43. Copy / Paste / Cut Commands क्या हैं?
उत्तर: Ctrl+C, Ctrl+V, Ctrl+X
प्रश्न 44. Font Size बढ़ाने का Shortcut?
उत्तर: Ctrl + Shift + >
प्रश्न 45. Line Spacing (1.5) Shortcut?
उत्तर: Ctrl + 5
प्रश्न 46. Print Command Shortcut?
उत्तर: Ctrl + P
Unit 14 – Practical Projects
प्रश्न 47. Resume में कौन-से Tools काम आते हैं?
उत्तर: Table, Border, Alignment, Text Formatting
प्रश्न 48. Certificate Template में कौन-से Features शामिल होते हैं?
उत्तर: Shapes, WordArt, Page Border, Mail Merge
प्रश्न 49. Marksheet में Formula कैसे लगाते हैं?
उत्तर: Layout → Formula → =SUM(LEFT)
प्रश्न 50. Mail Merge Letter को Print करने का Step?
उत्तर: Finish & Merge → Print Documents
Top 50 Viva “Rapid Fire” Questions (One-Line Quick Answers)
| प्रश्न | उत्तर |
| 1. MS Word का Full Form | Microsoft Word |
| 2. Word Processor क्या करता है? | Text Typing, Editing, Formatting |
| 3. Clipboard Shortcut | Ctrl + C / X / V |
| 4. File Extension | .docx |
| 5. Header जोड़ने का Menu | Insert → Header |
| 6. Footer जोड़ने का Menu | Insert → Footer |
| 7. Line Spacing | Ctrl + 1 / 2 / 5 |
| 8. Page Orientation | Portrait / Landscape |
| 9. Font Dialog Box | Ctrl + D |
| 10. Find & Replace | Ctrl + H |
| 11. Save As Dialog | F12 |
| 12. Table Insert | Alt + N + T |
| 13. Merge Cells | Alt + JL + M |
| 14. Chart Insert | Alt + N + C |
| 15. Watermark | Design → Watermark |
| 16. Page Color | Design → Page Color |
| 17. Mail Merge | Letters / Labels |
| 18. Comments | Ctrl + Alt + M |
| 19. Thesaurus | Shift + F7 |
| 20. Proofing Tools Tab | Review Tab |
| 21. Styles Pane | Alt + Ctrl + Shift + S |
| 22. Macro | View → Macros |
| 23. Restrict Editing | Review → Restrict Editing |
| 24. Compare Documents | Review → Compare |
| 25. Word Count | Ctrl + Shift + G |
| 26. Page Setup | Layout → Margins |
| 27. Insert Picture | Alt + N + P |
| 28. Insert SmartArt | Alt + N + M |
| 29. Table of Contents | References → TOC |
| 30. Footnote Shortcut | Alt + Ctrl + F |
| 31. Excel Link | Insert → Object |
| 32. Print Shortcut | Ctrl + P |
| 33. Close Document | Ctrl + W |
| 34. Select All | Ctrl + A |
| 35. Justify | Ctrl + J |
| 36. Clear Formatting | Ctrl + Spacebar |
| 37. Paste Special | Ctrl + Alt + V |
| 38. Save to PDF | File → Save As → PDF |
| 39. Watermark Type | Text / Picture |
| 40. Font Increase | Ctrl + Shift + > |
| 41. Font Decrease | Ctrl + Shift + < |
| 42. Track Changes | Ctrl + Shift + E |
| 43. Print Preview | Alt + F + W + P |
| 44. Columns | Layout → Columns |
| 45. Theme | Design → Themes |
| 46. File Password | File → Info → Protect |
| 47. Page Border | Design → Page Borders |
| 48. Help | F1 |
| 49. Redo | Ctrl + Y |
| 50. Exit | Alt + F4 |
Conclusion
उम्मीद है कि यह Microsoft Word Notes in Hindi आपके लिए उपयोगी साबित हुए होंगे। इस ब्लॉग में MS Word की सभी महत्वपूर्ण Topics को 15 Units में सरल और आसान भाषा में समझाया गया है, जिससे Beginner से Advanced Level तक के विद्यार्थी आसानी से सीख सकें।
ये Notes विशेष रूप से BCC, CCC, ADCA, O-Level तथा अन्य Competitive Exams की तैयारी करने वाले विद्यार्थियों के लिए बेहद मददगार हैं। यदि आप नियमित Practice करते हैं, तो आप Microsoft Word के सभी महत्वपूर्ण Features को आसानी से समझ सकते हैं और अपने Computer Skills को बेहतर बना सकते हैं।
अगर आपको यह ब्लॉग पसंद आया हो, तो इसे अपने दोस्तों और विद्यार्थियों के साथ जरूर शेयर करें।